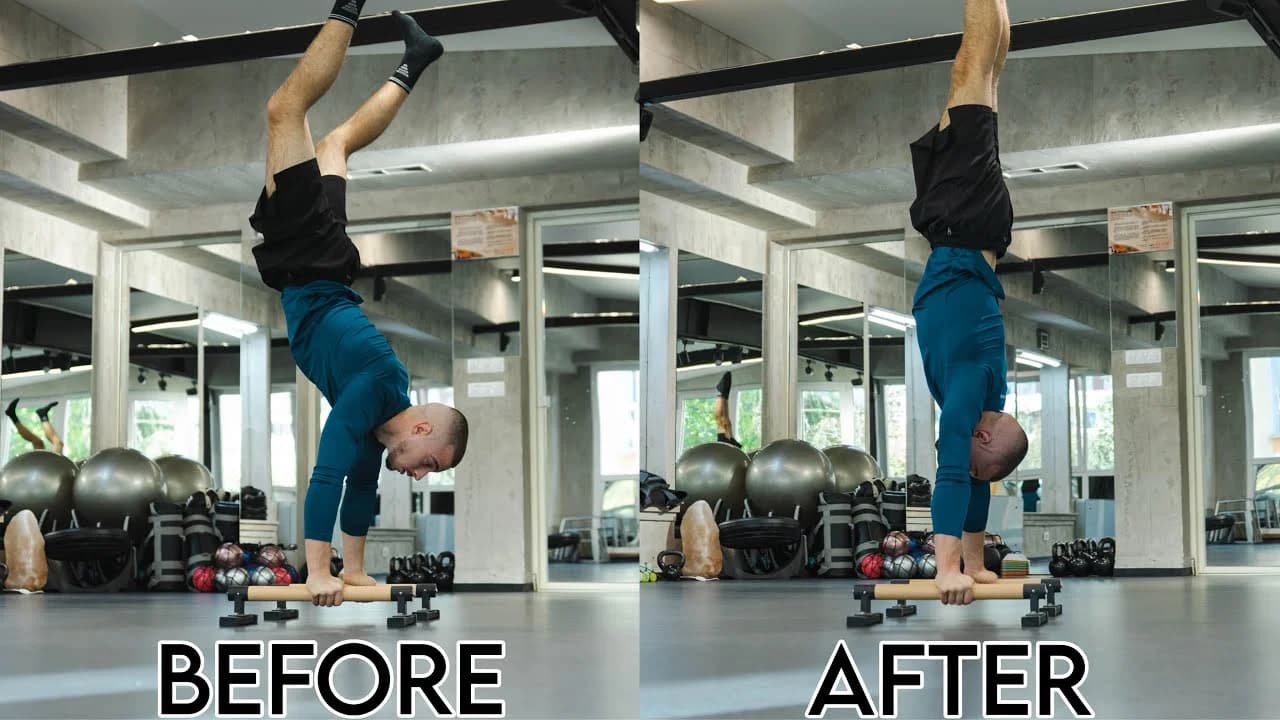
The handstand is one of the first real balance skills in calisthenics, and getting it right unlocks everything that comes after it, from press handstands to one-arm work. Most people who try it can technically do the strength part, push-ups are enough to start, but they never get past the fear of falling. It sits early in most calisthenics progressions, right alongside basic pushing strength, but it takes its own dedicated practice to actually own it. In this tutorial I cover the real prerequisites, how to remove the fear of kicking up, the full body positioning that makes a handstand hold together, and a progression from your first kick to a wall-assisted hold. By the end you will know how to start training it the safe way.
Watch the Full Tutorial
What Is the Handstand
The handstand is the skill of balancing your whole body upside down on your hands, arms locked, body in a straight line. It looks simple from the outside. Underneath it is a mix of shoulder strength, wrist control, core activation, and balance that most people have never trained together.
I do not treat the handstand as a strength move first. It is a balance skill you build strength around. That is why the biggest obstacle for most beginners is not their shoulders or their core, it is fear. Fear of kicking up and falling, fear of losing control mid-air. I built my own teaching method around removing that fear first, then layering the technique on top of it.
In this tutorial I cover the real minimum requirements to start, how to overcome the fear of falling with a safe kick and bail method, the full body positioning you need for a clean handstand, and a wall-assisted way to start building your hold. By the end you will know how to start training the handstand from zero, safely.
Prerequisites
You do not need a long list of prerequisite skills for the handstand. What you need is basic pushing strength and control over your own body weight on your hands.
- 10 to 15 clean push-ups with good form, either on the ground or on parallettes
- No pull-up requirement, this is a pushing and balance skill, not a pulling one
- Access to a flat wall for the assisted hold work later in this progression
That is genuinely the bar. If you have that pushing base, you are ready to start.
How to Do the Handstand
Before you chase a hold, get the body position right. I build it from the wrists up.
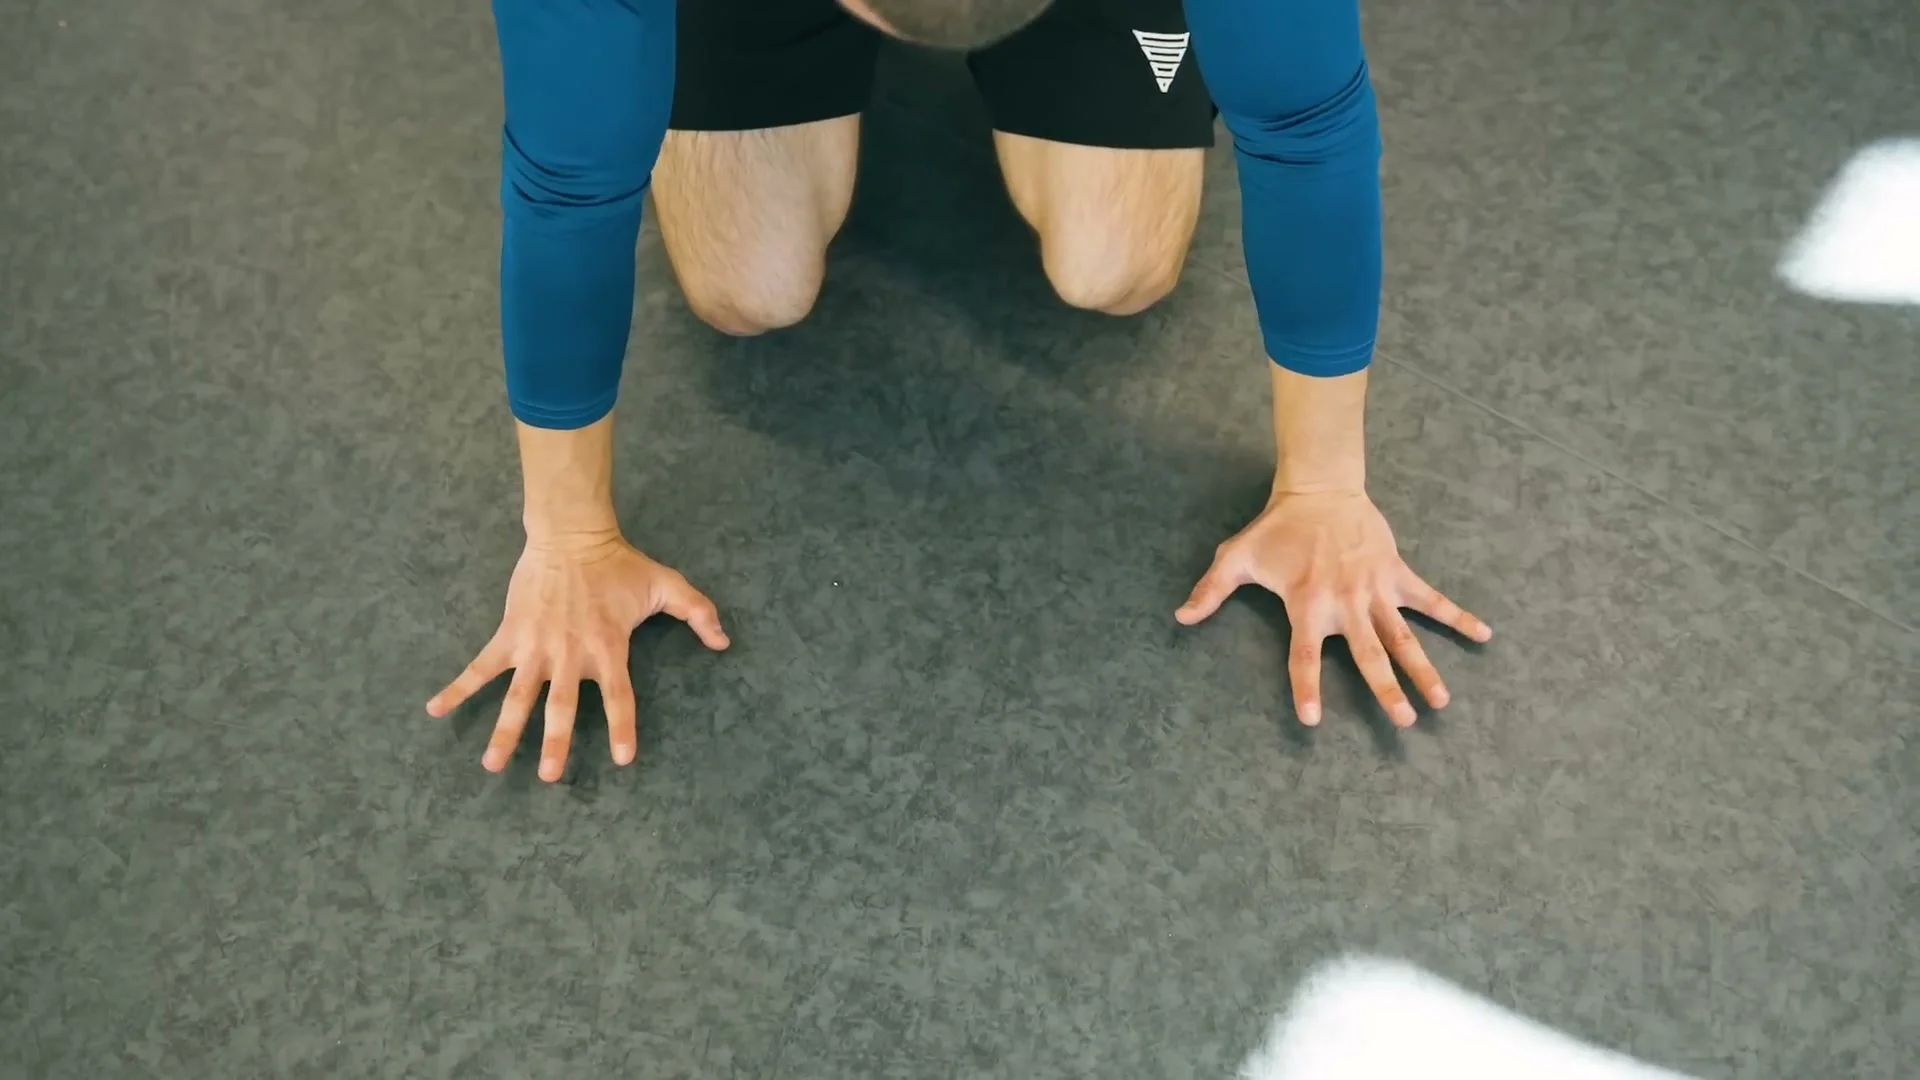
Set your hands slightly wider than shoulder width, not narrow, not too wide. Spread your fingers. A closed hand gives you almost no ability to correct left and right once you are upside down, an open hand gives you far more surface area to balance with and it is easier on your wrists too.
Lock your elbows straight. This will feel harder to hold than it sounds when you are new to it, but a bent elbow is the first thing that breaks a handstand.
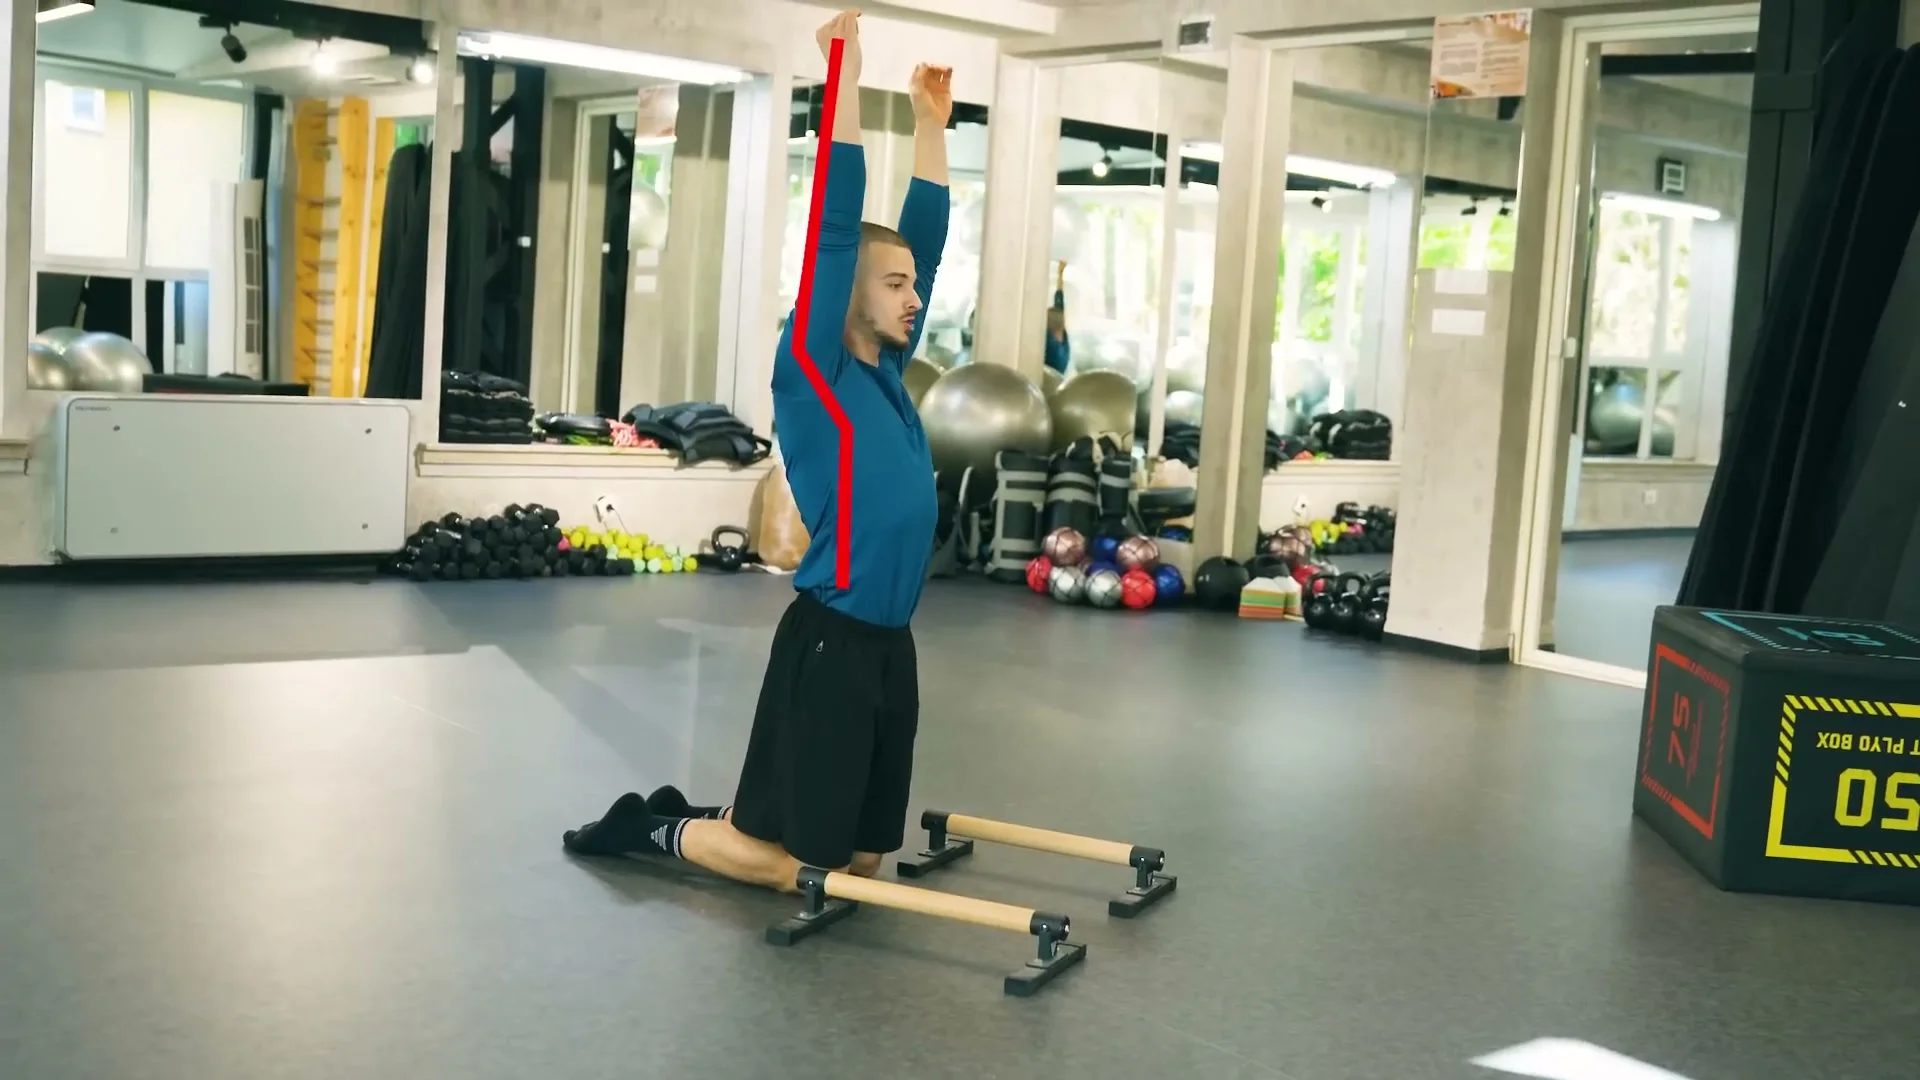
Your shoulders are the part that matters most. If your shoulders stay closed off instead of fully extended overhead, your chest pushes out, your back arches, and your core switches off. From there your hips drift and the whole handstand falls apart. So push your arms all the way up past your ears and open your shoulders as far as they will go.
With your shoulders extended, squeeze your core and squeeze your glutes at the same time. That is what stabilizes the position, not the arch in your lower back. Keep your legs together above you.
Last detail, and one most people skip: your eyes should be looking down at the floor exactly between your two wrists, not out in front, not behind. Where your head goes, your shoulder position follows, so keeping your eyes fixed between your wrists helps keep your shoulders extended too.
Progression: From Zero to Handstand
Key Takeaway
No one kicks straight into a clean handstand. You remove the fear of falling first, then build the position stage by stage. Skipping the bail work is the main reason people stay stuck and scared.
These are the stages I work through with beginners, in order. Do not rush to the next one until the current stage feels controlled.
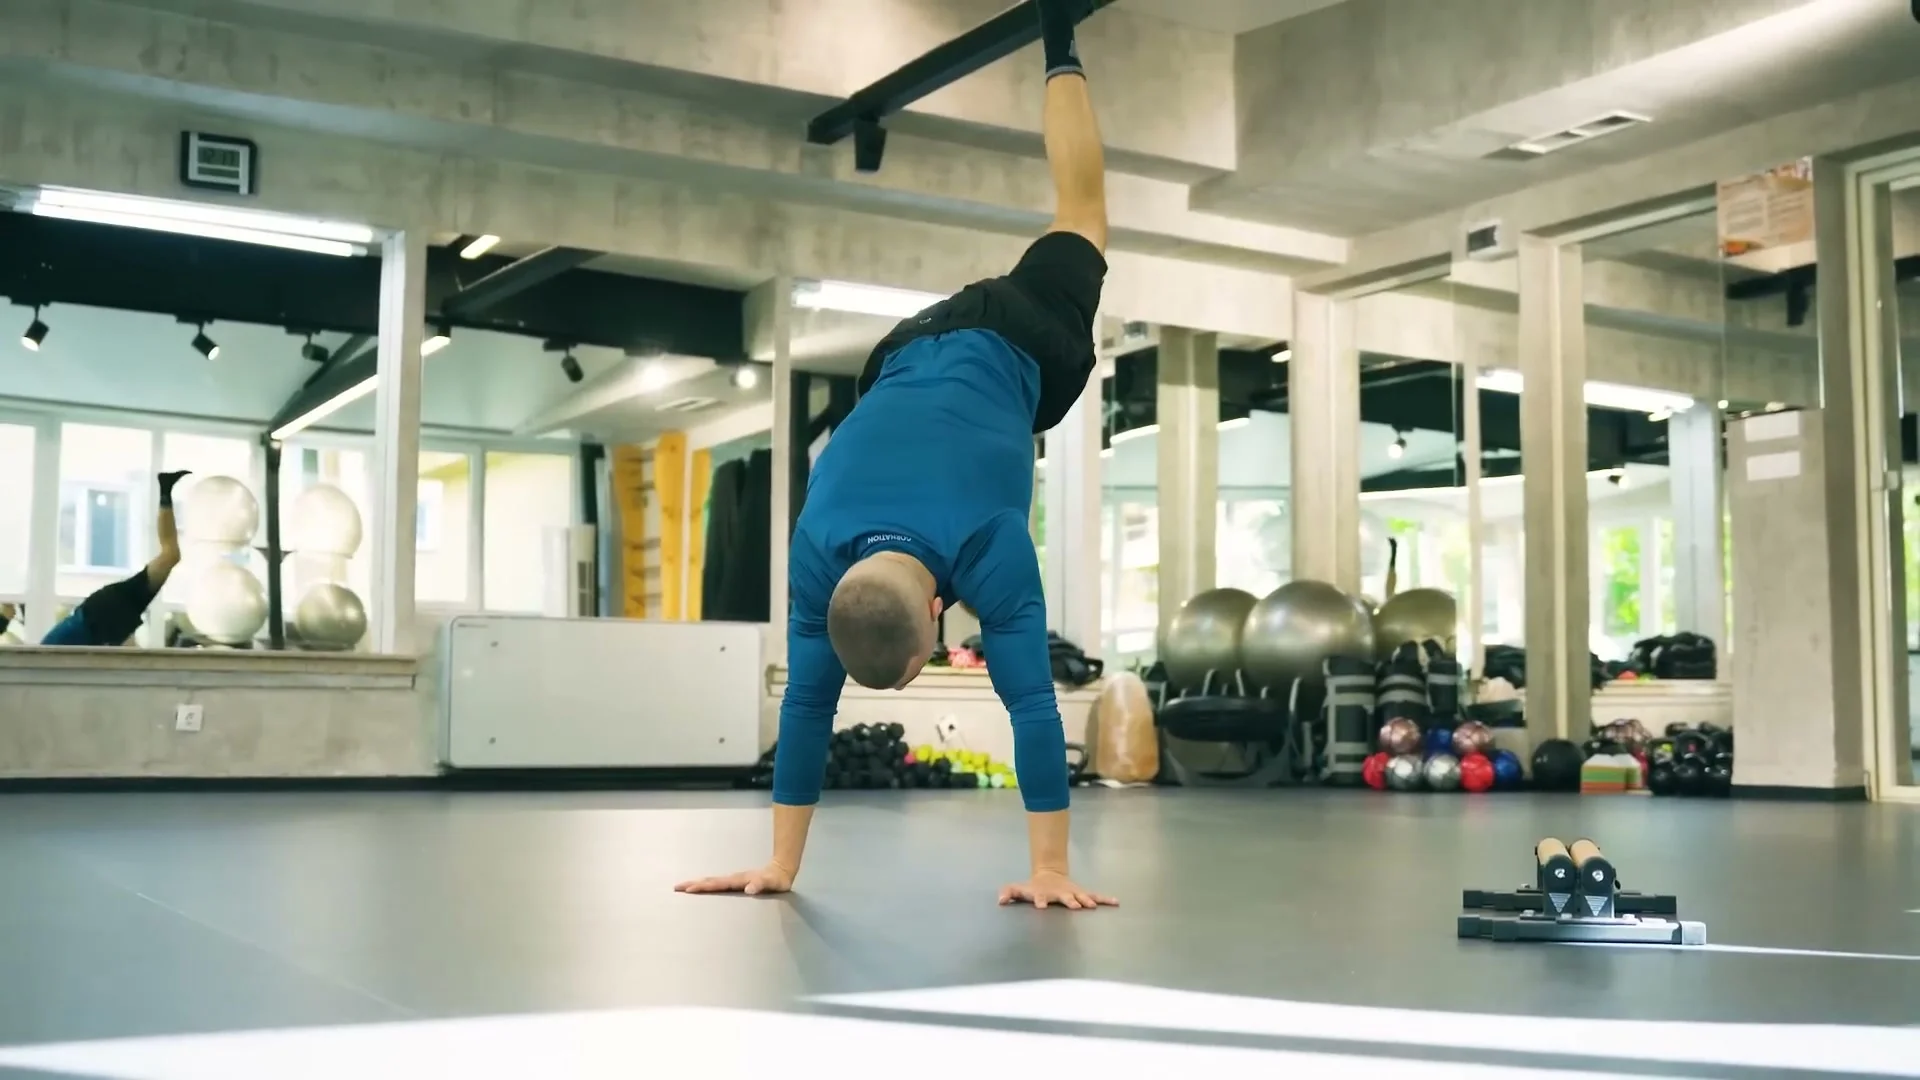
Stage 1: Learn to Fail Safely
Before anything else, learn how to come down from a handstand without panicking. Pick whichever leg feels more natural to kick with, you will know immediately which one that is. Set your hands down with one wrist slightly in front of the other, this staggered hand position is what lets you catch and rotate out of a fall instead of collapsing straight down.
Start with small, short kicks just to feel the movement, keeping your arms straight the whole time. Gradually increase how hard you kick. The moment you feel yourself losing balance, rotate to the side using that staggered wrist position. This is not about hitting a handstand yet, it is about removing the fear of the fall.
Stage 2: The Box Progression
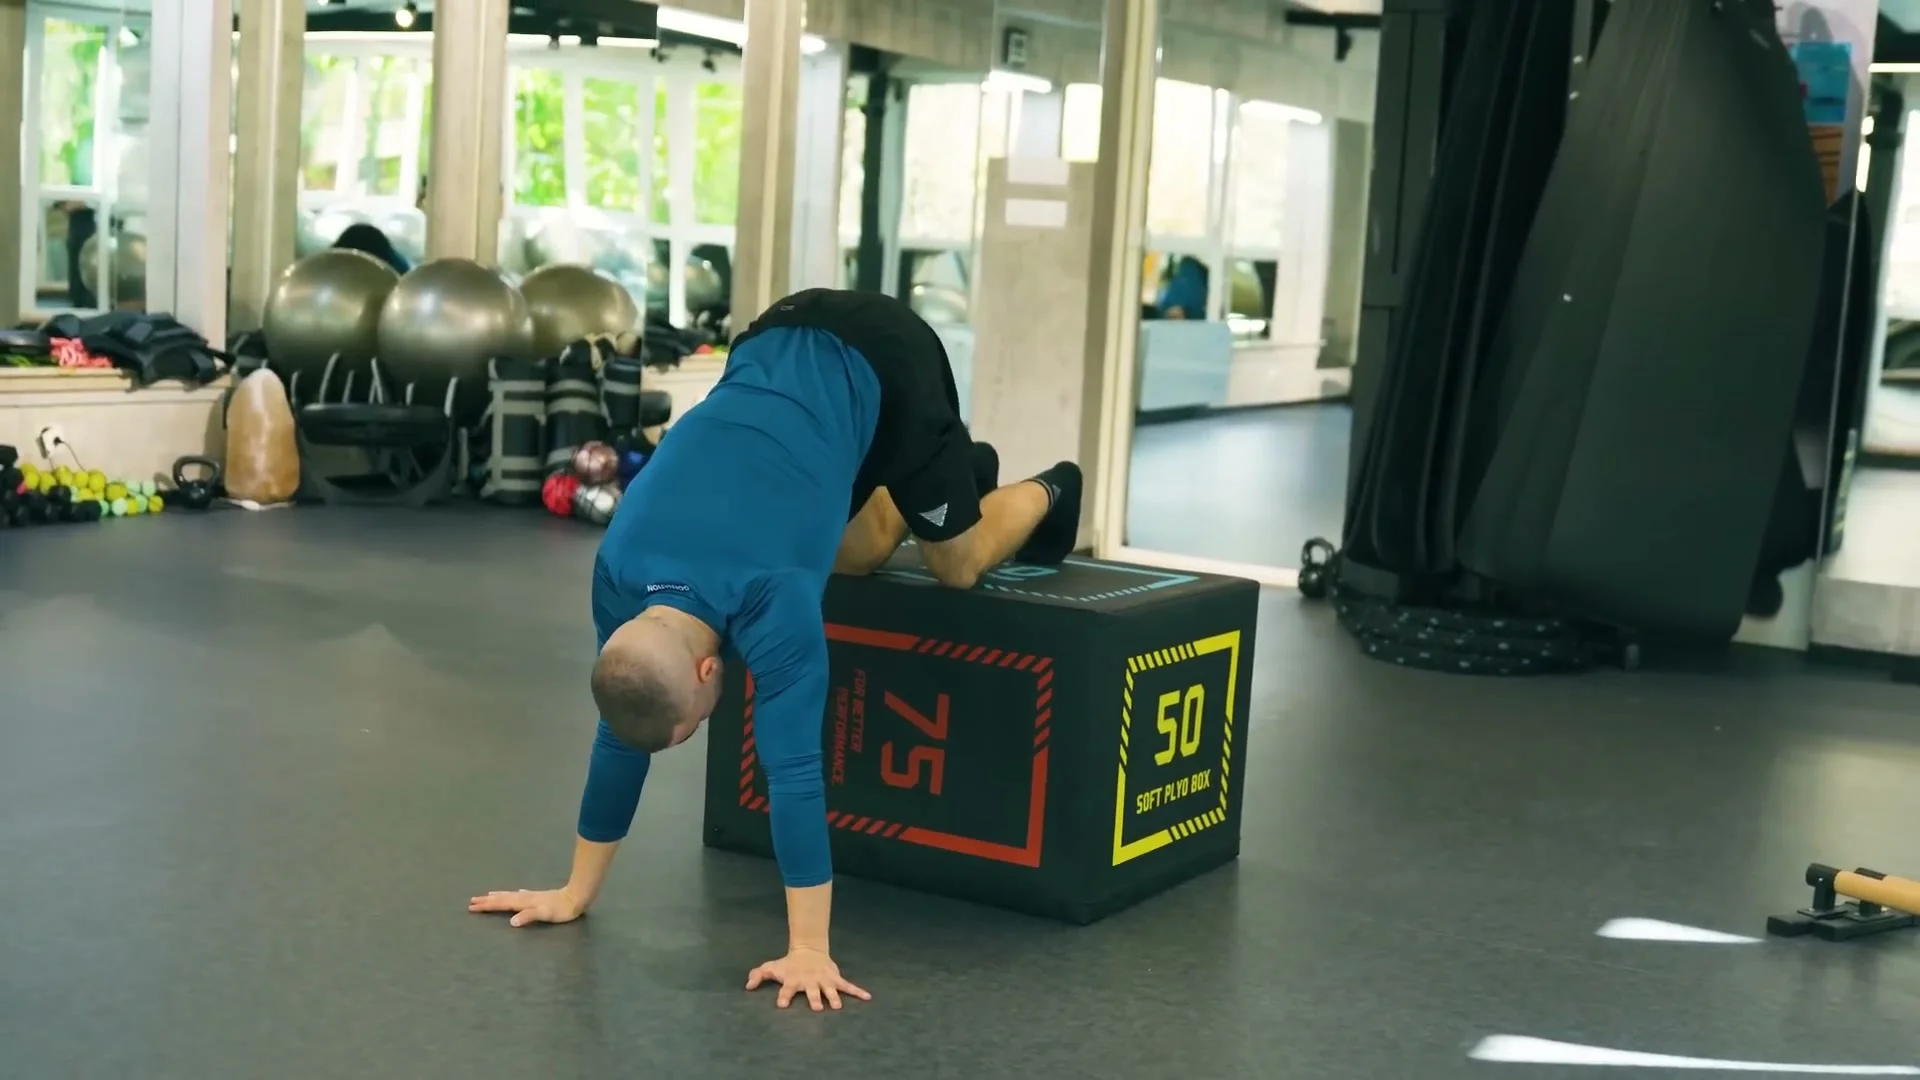
Once the small kicks feel controlled, add a box. Kneel on the box with one knee, and kick up with the other leg, keeping your arms straight the entire time. If the kick starts to feel like too much swing, you can kick lightly and come back down from the same position. This middle step lets you feel the handstand position with less commitment than a full kick from the floor.
Stage 3: Full Kick, Controlled Bail
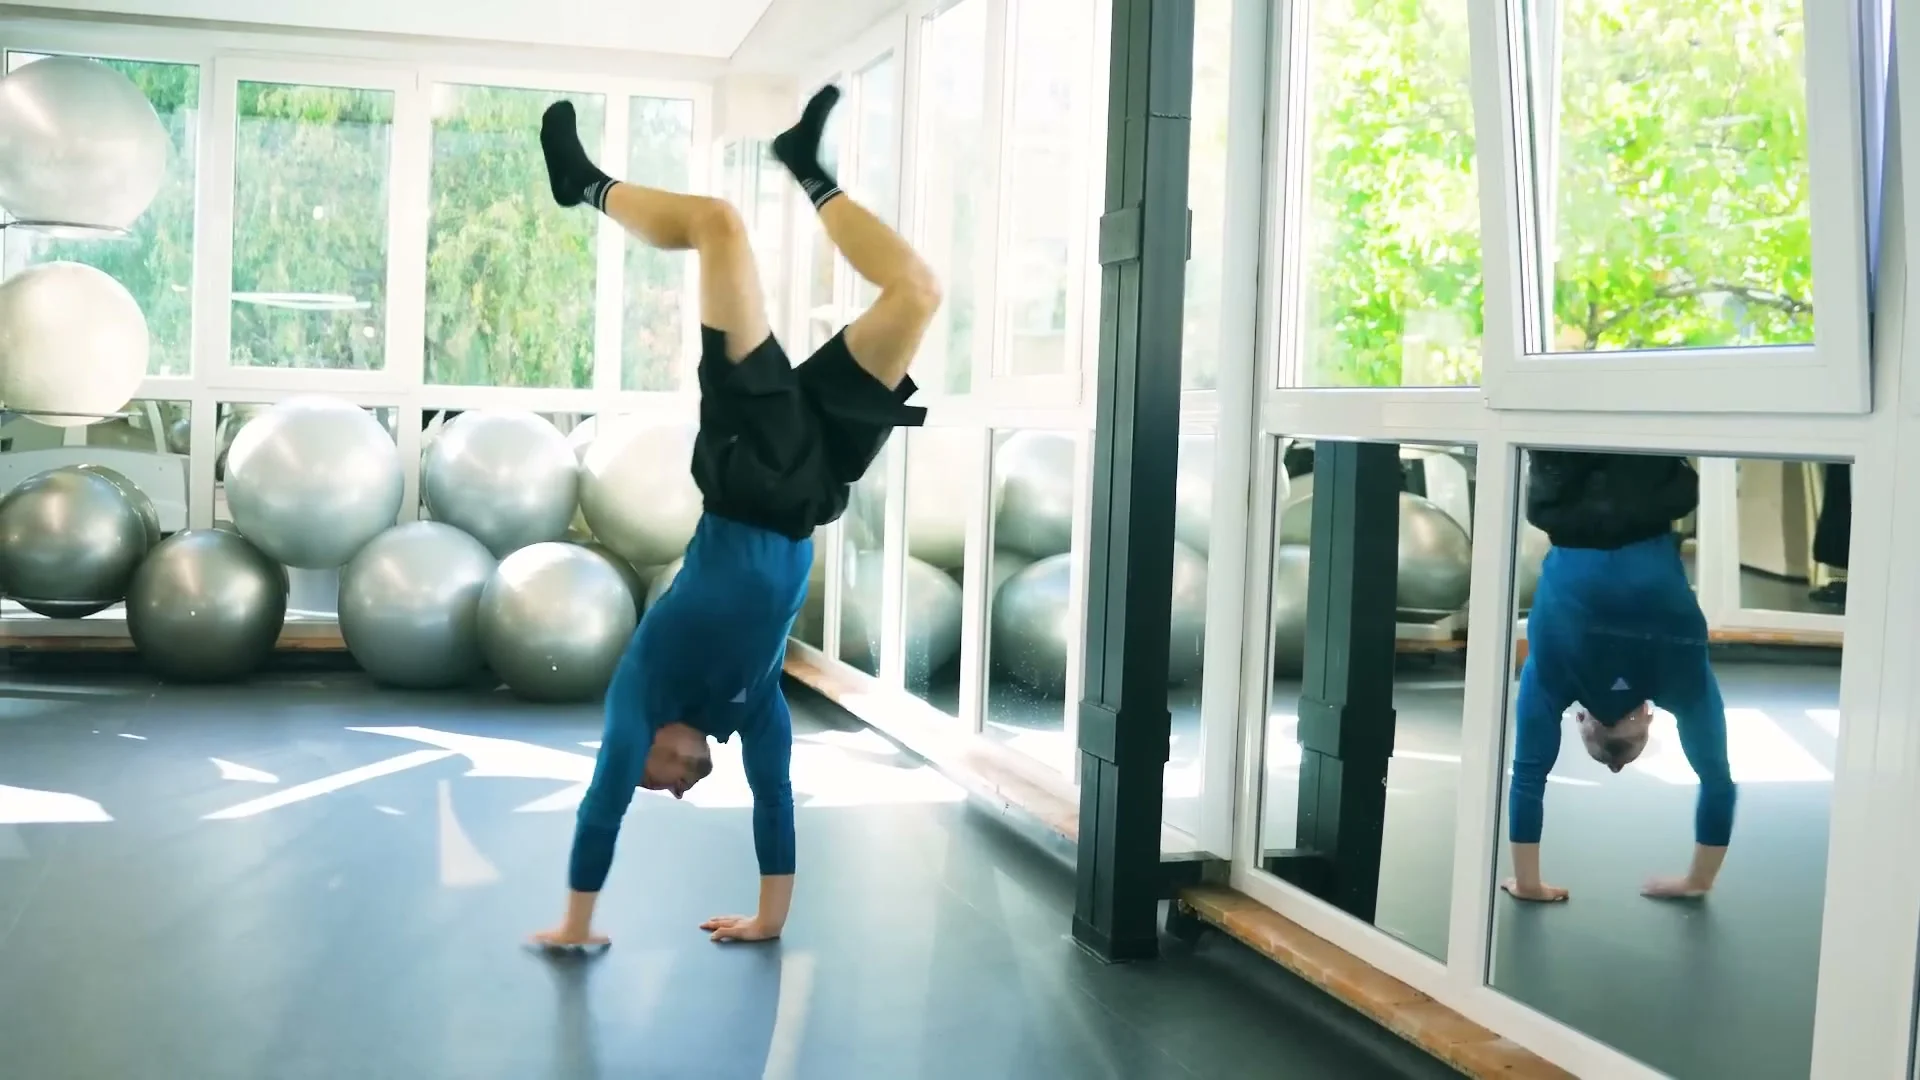
Now put it together. Kick all the way up toward the handstand position, and practice coming back down under control rather than swinging through. Keep that lead wrist staggered in front of the other so you can bail to the side the instant you feel yourself going too far. Repeat this until the kick up and the controlled comeback both feel automatic.
Stage 4: Full Body Positioning on Parallettes
With the fear handled, move to parallettes and start applying the technique from the section above: wrists wide, fingers open, elbows locked, shoulders fully extended, core and glutes squeezed, eyes between your wrists. Kick up into this position repeatedly and focus on holding the correct shape rather than just holding balance.
Stage 5: Wall-Assisted Holds
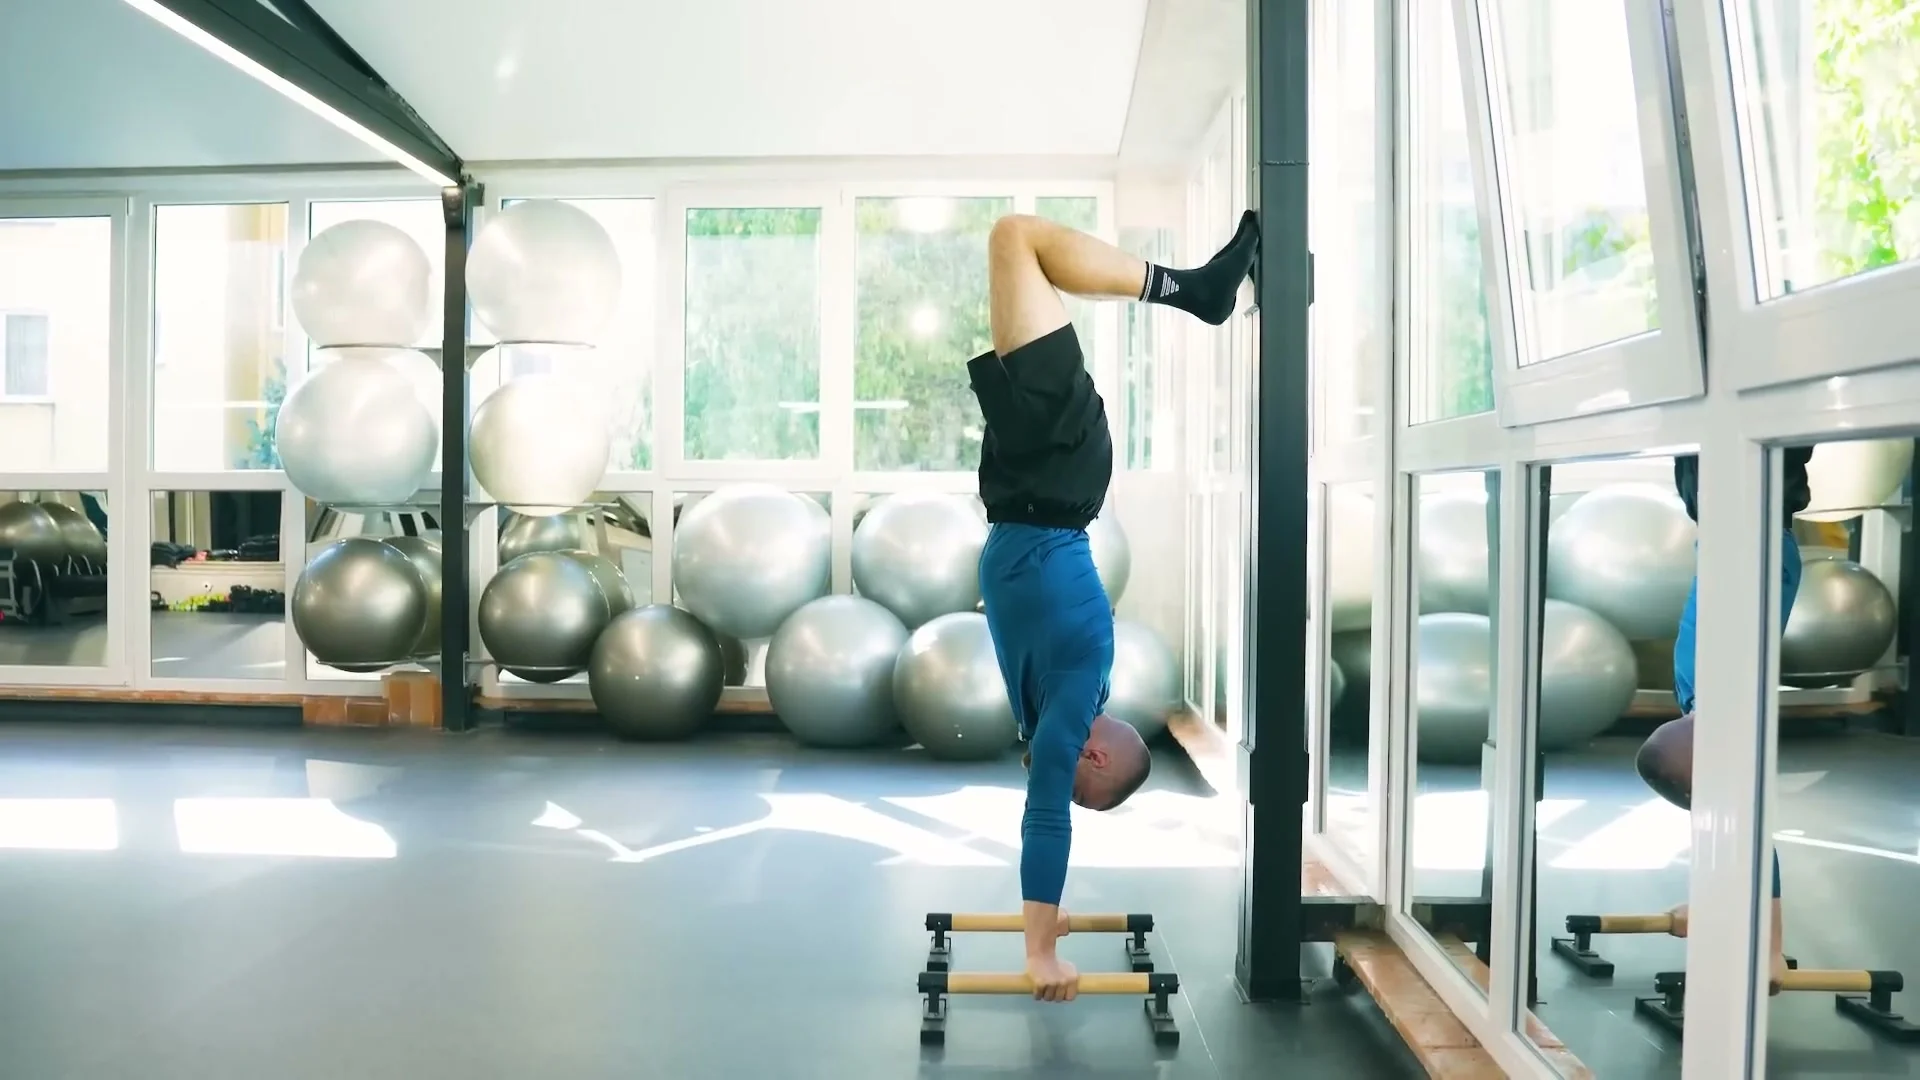
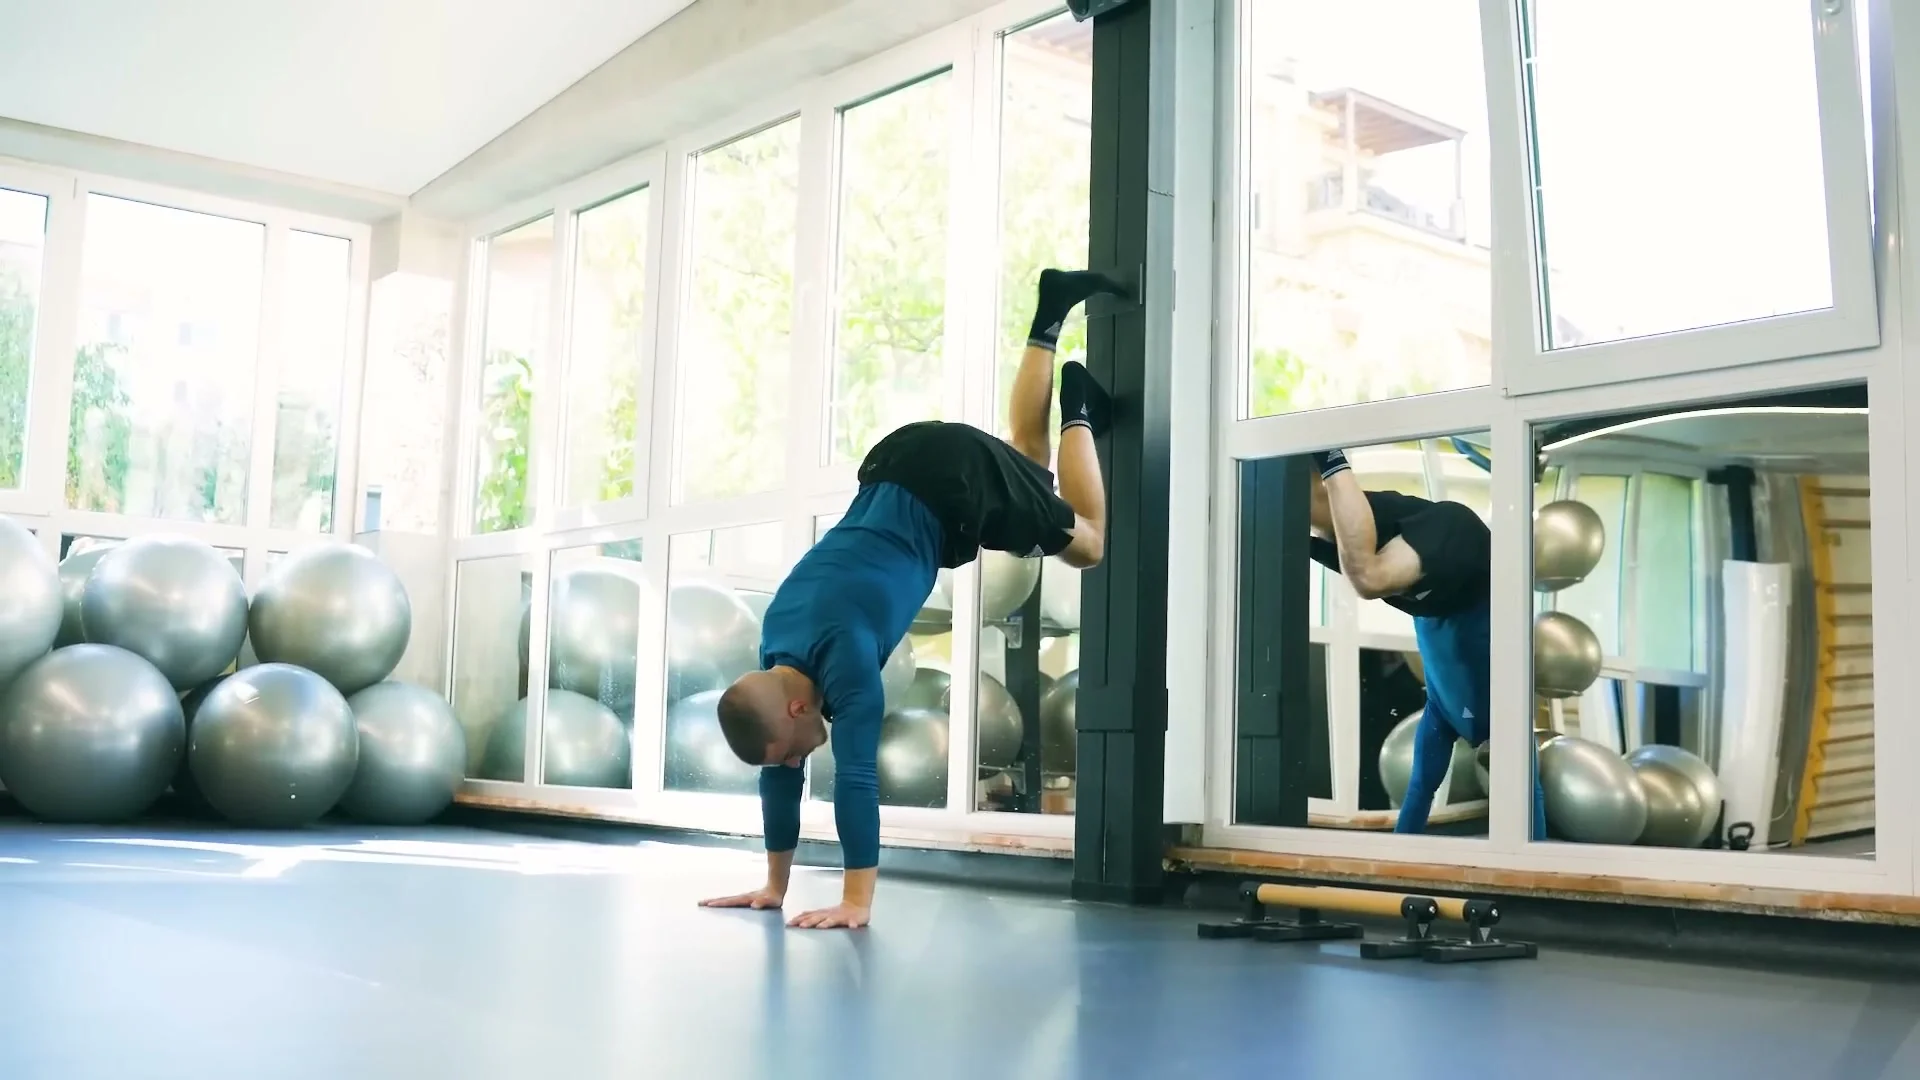
Set your parallettes (or hands) roughly 20 centimeters from a wall, back facing the wall. Kick up and let your legs rest against the wall, one leg or both, to take the balance demand out of the equation for a moment. From there you can practice switching legs while holding the position. Do not let your back arch into the wall, keep extending through the shoulders and hold the correct shape even with the wall as support. This is where you start building real hold time before removing the wall altogether.
Common Mistakes
These are the mistakes I see most often with beginners, and every one of them is fixable.
Shoulders That Are Not Fully Extended
This is the big one. When your shoulders stay closed instead of pushing all the way up past your ears, your chest opens, your back arches, and your core switches off. Your hips drift and the line breaks. Fix the shoulder extension before you worry about anything else.
Bending the Elbows
A bent elbow is usually the first thing that collapses a handstand. Locking your arms straight feels harder than it sounds when you are new to it, but a soft elbow gives you nothing to balance on. Keep them straight from the moment you kick up.
Being Afraid to Commit to the Kick
Fear is what stops most people from ever building the movement. If you never commit to the kick, you never learn the pattern. That is exactly why the bail work in Stage 1 comes first: once you know you can rotate out safely, the fear stops holding you back.
Looking in the Wrong Place
Letting your eyes drift out in front of your hands or back behind them drags your head out of position, and your shoulders follow your head. Keep your eyes fixed on the floor between your two wrists.
Training Tips
Train the handstand when you are fresh, not at the end of a session. Balance is a skill, and a tired nervous system learns it slowly. Short frequent practice beats one long exhausted session.
Give the position real reps. You are not building strength here as much as a movement pattern, so many small quality attempts serve you better than a few sloppy ones.
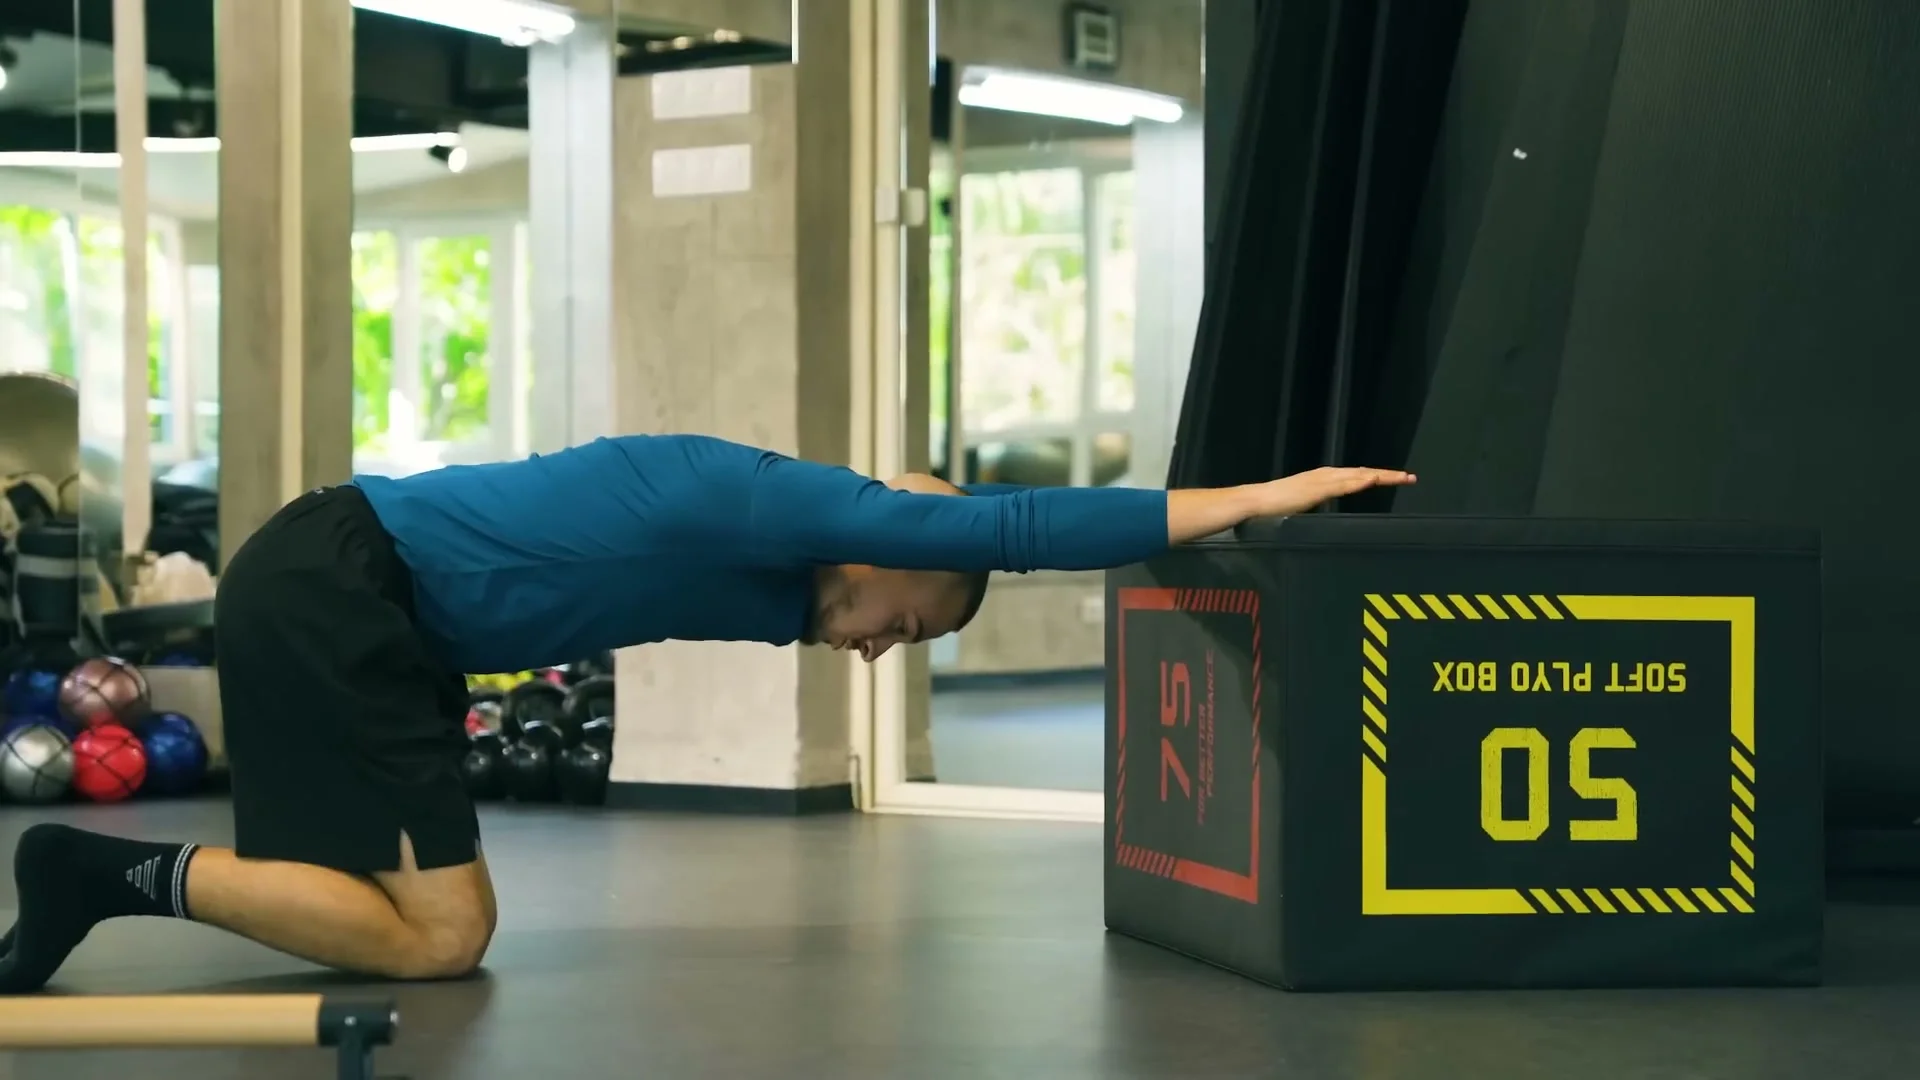
Work on your shoulder mobility. This is a big limiter for most people: if your shoulders cannot open fully overhead, you will arch your back to fake the line every time. Rest one arm on a box or raised surface, drop your chest, and let the shoulder open. I do this for three sets of about 30 seconds, and over time it makes the overhead position far easier to hold.
Frequently Asked Questions About the Handstand
Do I need to be strong to learn a handstand?
You need a basic pushing base, around 10 to 15 clean push-ups is enough to start. Beyond that, the handstand is more about balance, positioning, and overcoming fear than raw strength.
Why do I keep falling out of my handstand?
The most common cause is a shoulder position that is not fully extended. When your shoulders stay closed, your chest opens, your core switches off, and your hips drift, which breaks the whole line. Fix the shoulder extension first.
Where should I look during a handstand?
Look at the floor exactly between your two wrists. Looking too far forward or too far back pulls your head out of position, which drags your shoulder extension out of position with it.
Should I learn the handstand facing the wall or with my back to the wall?
Start with your back to the wall. It lets you kick up and catch your legs against it while you build the position, without the added difficulty of judging distance with your face toward the wall. That comes later.
How long does it take to learn a handstand?
For most people with a basic pushing base, a first wall-assisted hold comes within a few weeks of consistent practice. A clean freestanding hold takes longer, often several months, because balance is a skill that only builds with regular reps.
Do I need pull-up strength for a handstand?
No. The handstand is a pushing and balance skill. Pulling strength is not part of what holds you up here.
If you want a training plan built around where your handstand actually is right now, that is the kind of thing I work through with people inside online coaching.

Daniel Hristov is a four-time calisthenics world champion and coach. He shares the exact methods he uses to train his own athletes.
More about Daniel →