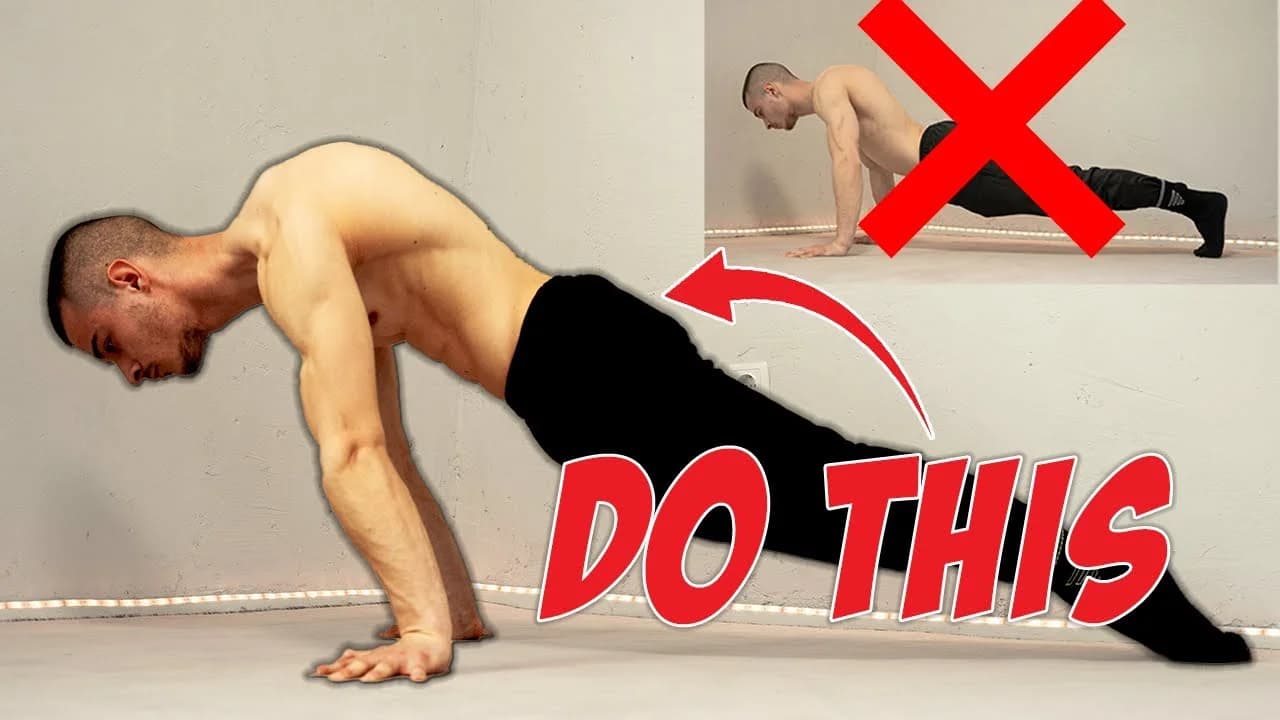
The planche is one of the hardest static holds in calisthenics, and one of the most satisfying to finally get. Anyone can start training toward it, but it takes straight-arm strength and shoulder control that most beginners simply do not have yet. It sits well beyond basic push-up strength in most skill progressions, which is why I break it into smaller pieces first. In this tutorial I cover the five exercises I use to introduce beginners to the planche: ground leans, parallette-supported leans, and three push-up variations. By the end you will know how to start training it and how to set your hands and elbows correctly from the first rep.
Watch the Full Tutorial
What Is the Planche
The planche is a static hold where you support your whole bodyweight on your hands, with your feet off the ground and your body held parallel to the floor. No feet on a box, no lean against a wall, just your arms, shoulders, and core doing the work.
It sits near the top of calisthenics skill lists because it demands straight-arm strength, shoulder stability, and body tension all at once. You will not get there in a few sessions. It is built through the same kind of lean and push-up work I show in this tutorial, done consistently over months.
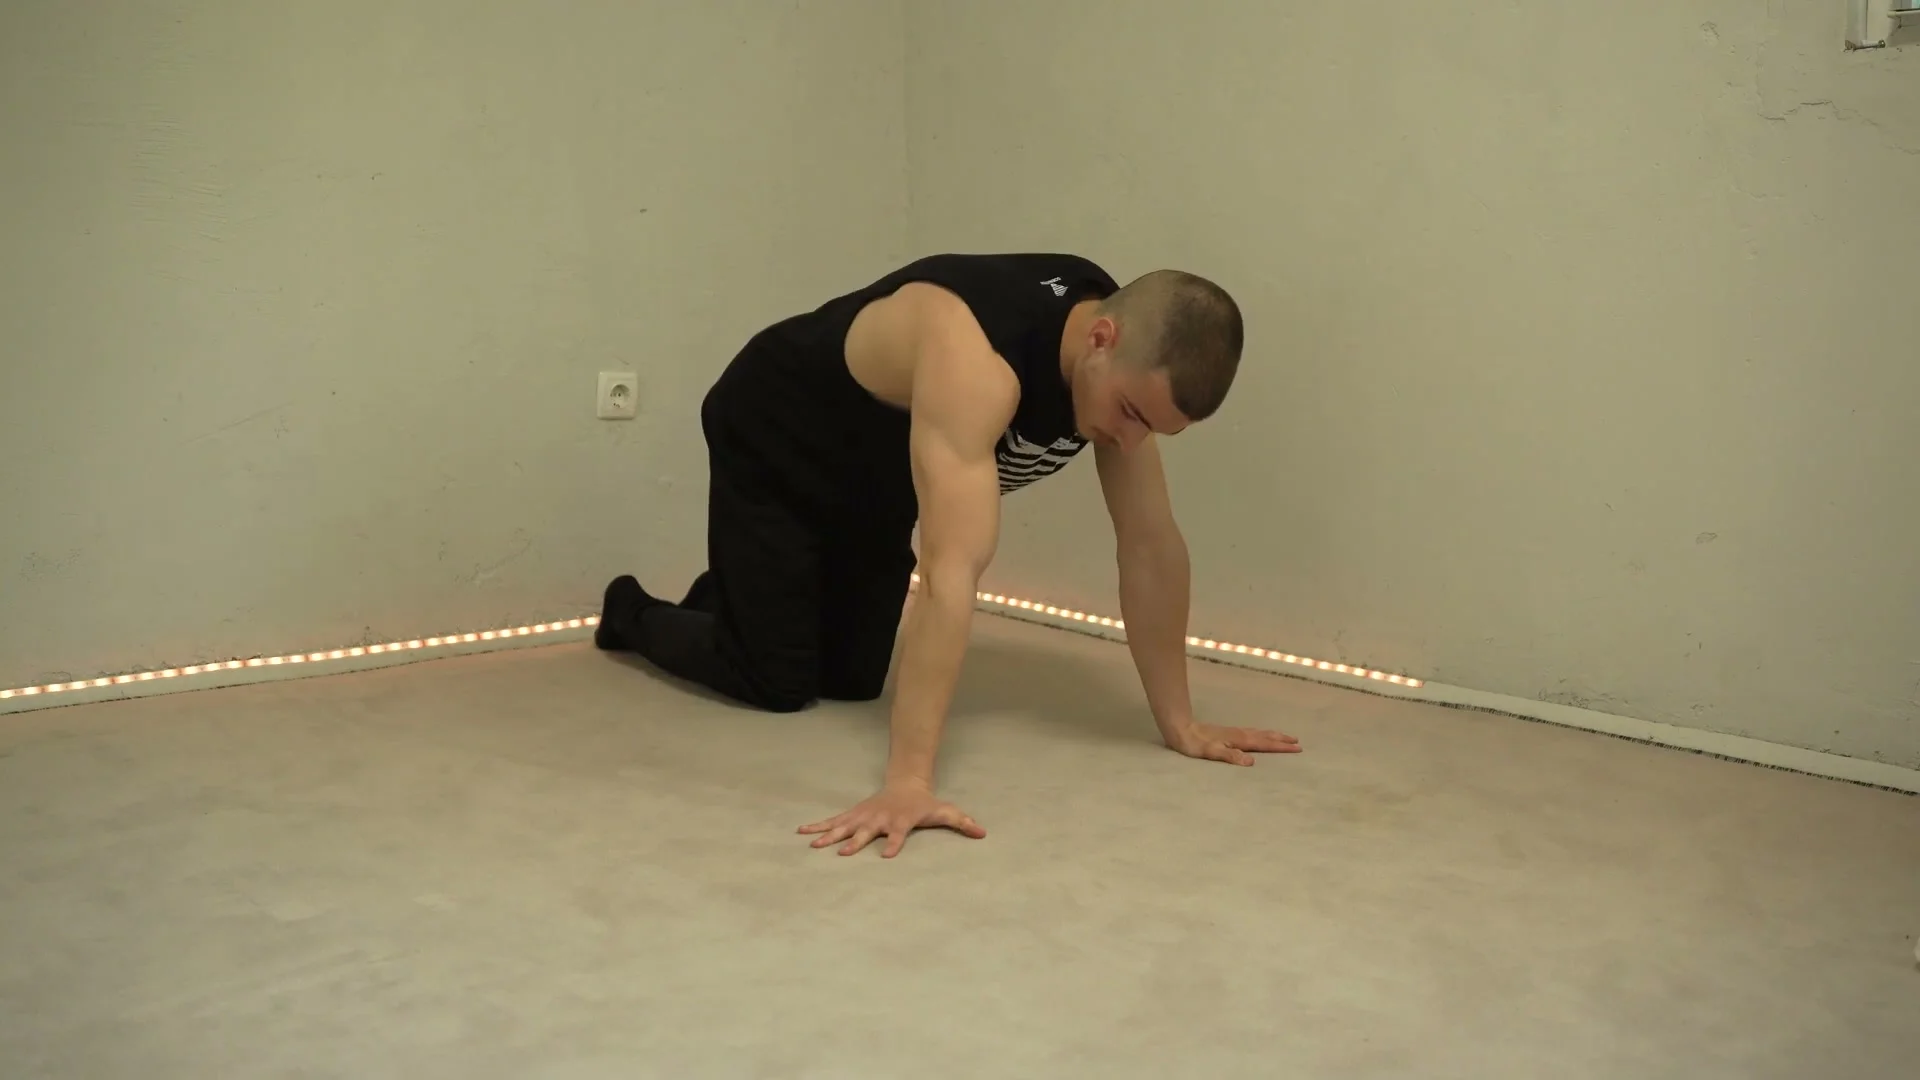
In this tutorial I cover the five exercises I give beginners who are starting their planche journey: the ground lean, the parallette-supported lean, lean push-ups, wall push-ups, and normal push-ups with a lean variation. By the end you will know how to start training the planche and how to do each exercise with the correct hand and elbow position.
Prerequisites
You do not need an existing planche or any specific strength test to start these five exercises. They are built for total beginners. What you do need is a body that can support itself on straight arms without pain in the wrists or elbows, and a willingness to train the routine regularly.
- Comfortable bearing weight on your hands (push-up position) without wrist pain
- Access to a flat floor, and ideally a set of parallettes for one of the exercises
- Ability to keep your elbows locked straight during a hold
- Consistency: I recommend training this routine two or three times a week, or more if you want
Technique
Every exercise in this routine shares the same setup. Get these cues right before you worry about hold time or reps.
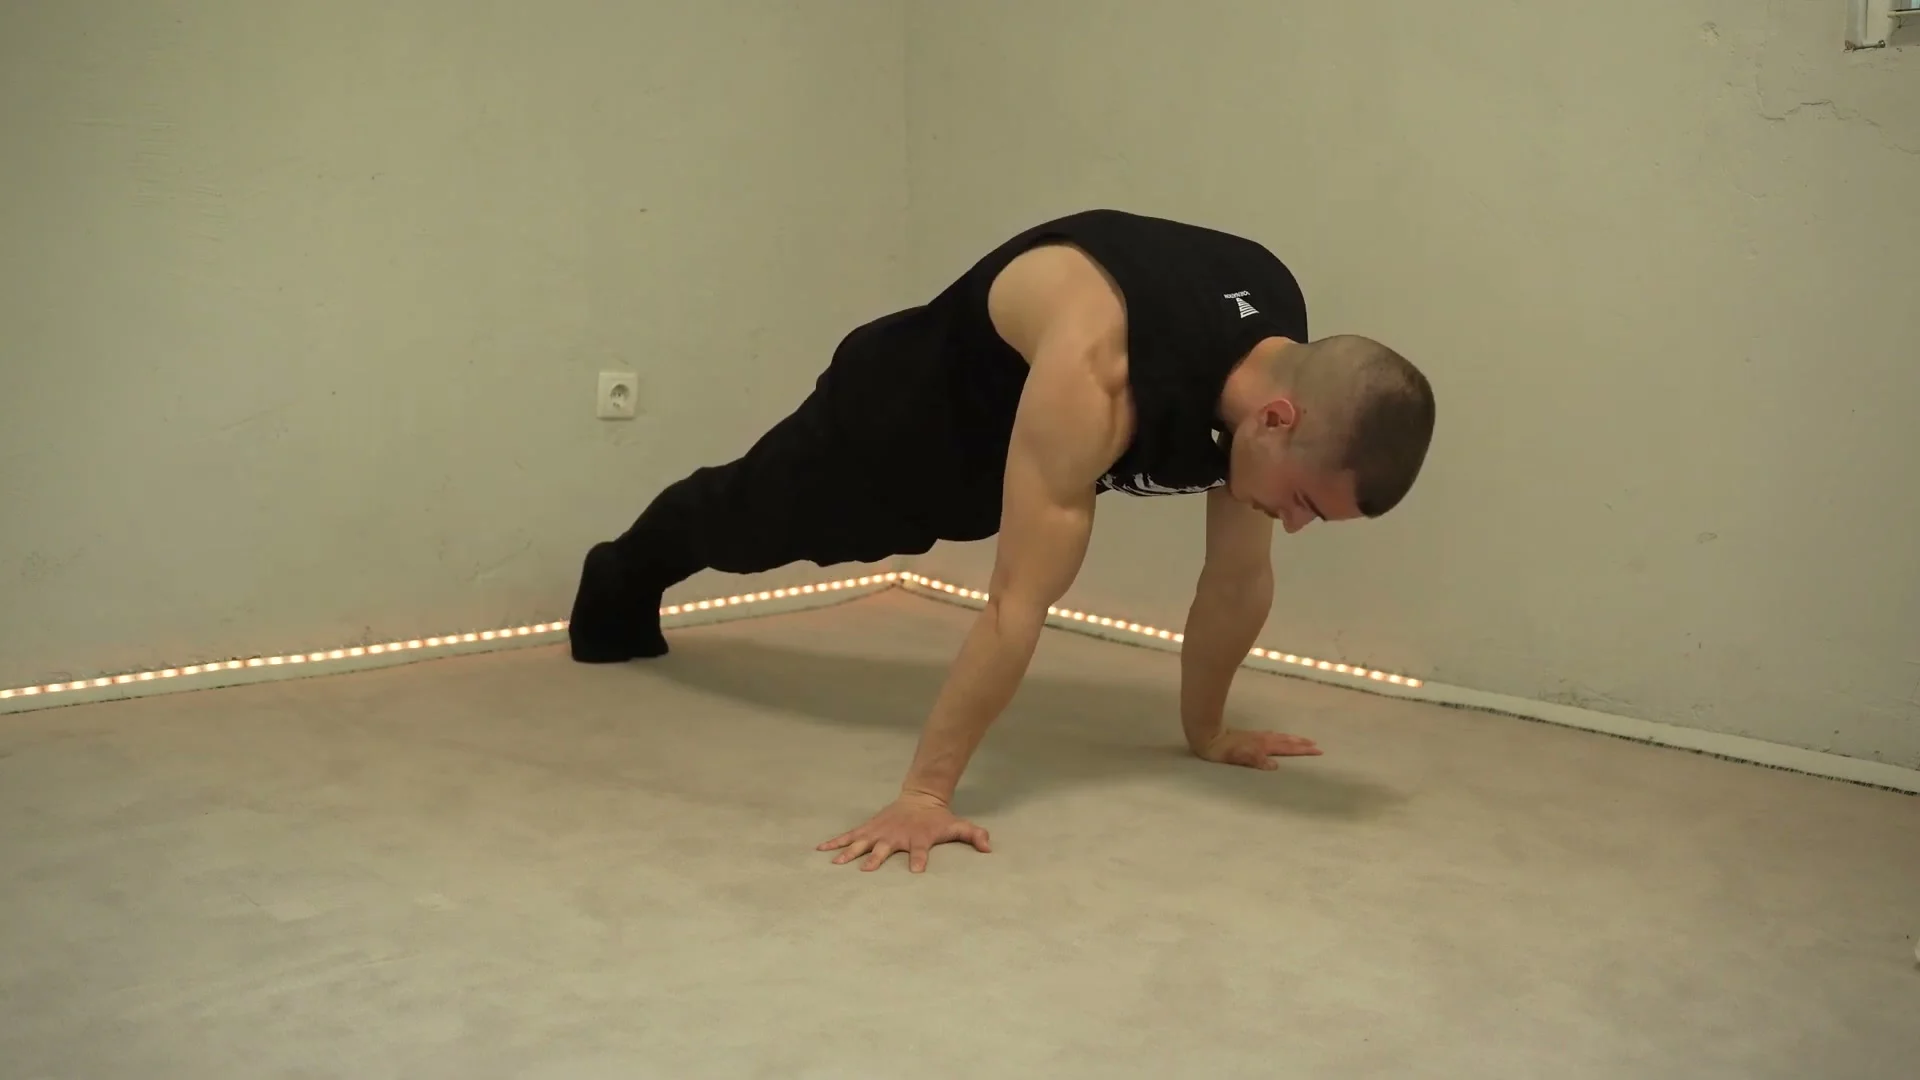
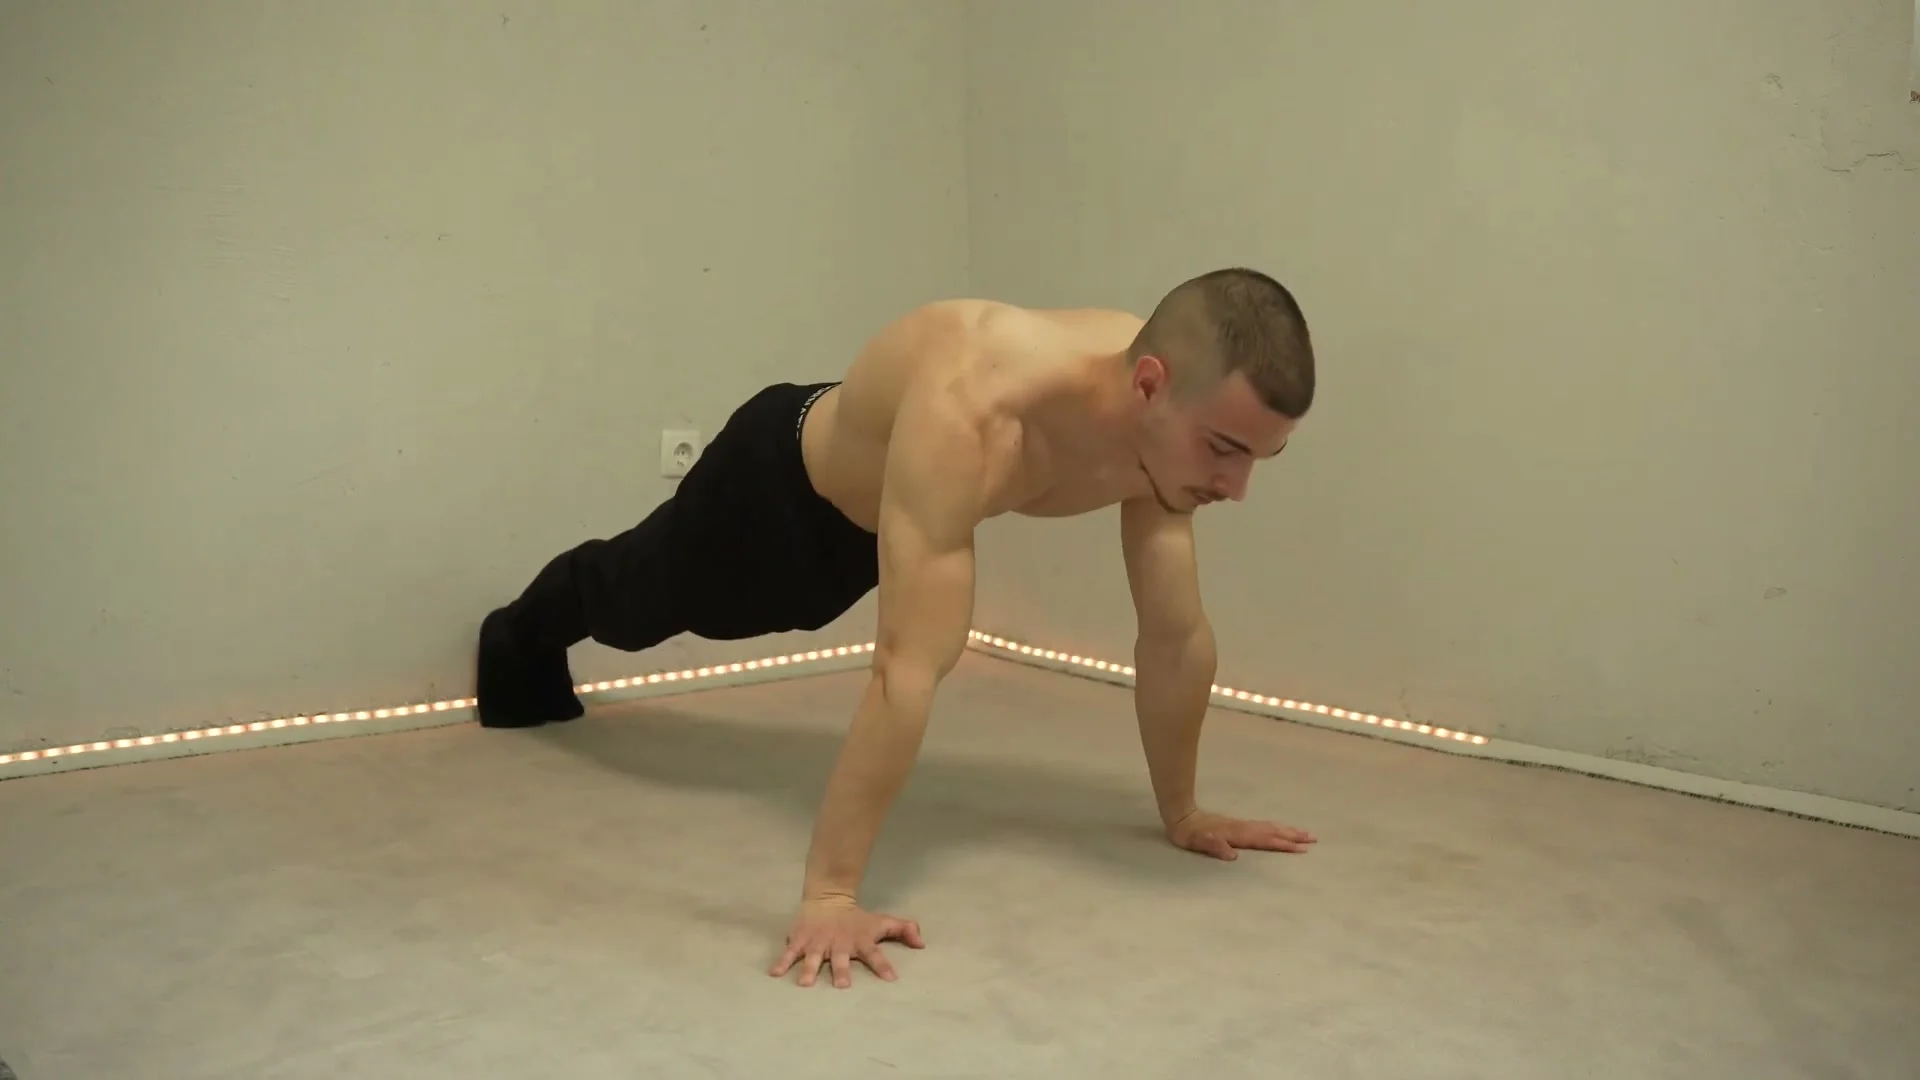
Hand position: thumbs point forward, and turn your biceps forward too. Your elbows stay straight and locked throughout, never bent.
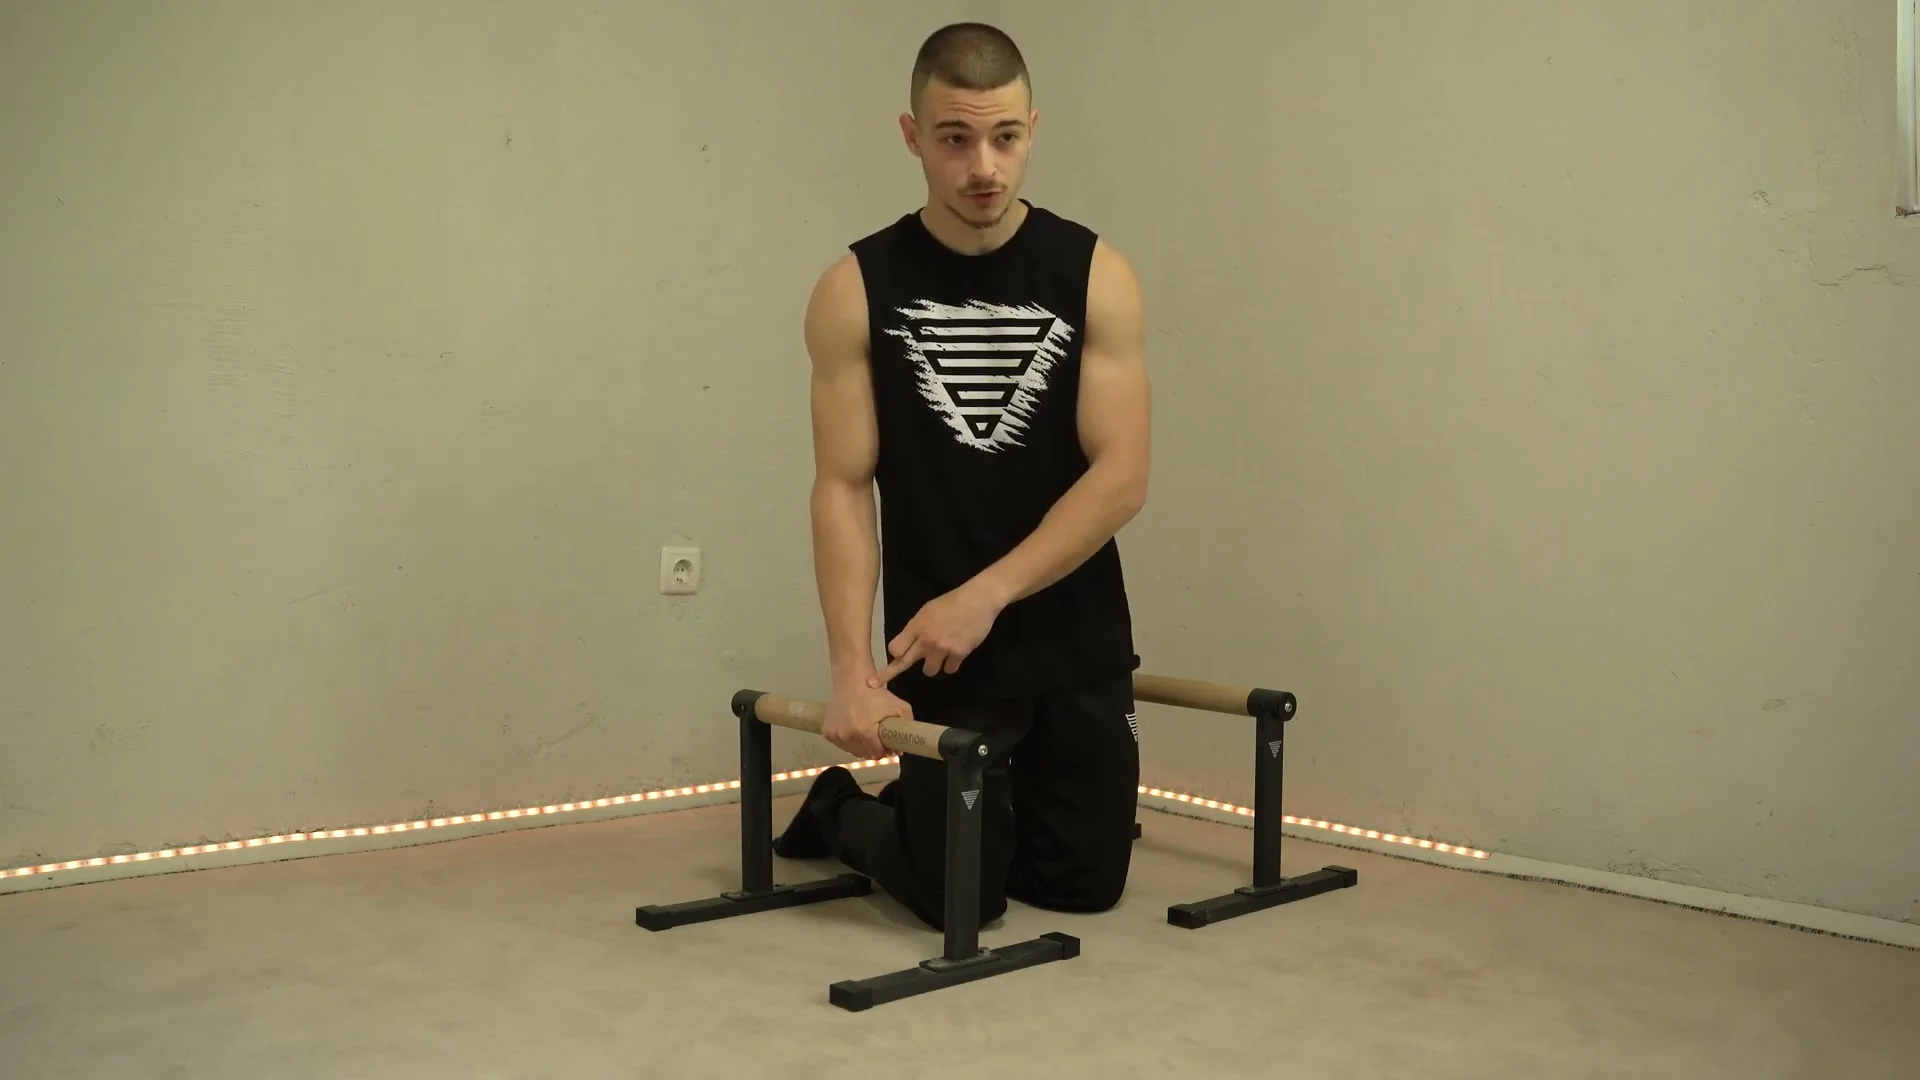
Grip width matters more than people think. Too wide an outside grip stresses the thumb. Too narrow an inside grip stresses the wrist. Aim for something in the middle.
Body position: hips down, shoulders in protraction (pushed away from your body, not pulled back into retraction). Lean your body forward from that straight-arm base and hold the line from your shoulders to your heels.
Keep your eyes looking forward, not down at your hands. This helps keep your head and spine in a neutral line instead of collapsing your chest toward the floor.
Progression: From Zero to Planche
Key Takeaway
No one starts these five exercises and holds a clean planche lean on day one. You build the position stage by stage, from a simple ground lean through push-up variations, and let hold time and control come from repetition, not from forcing a shape your body cannot yet support.
I train these five exercises in the same session, three rounds each, two to three times a week.
Stage 1: Planche Lean on the Ground
Start in the straight-arm position described above, thumbs forward, biceps turned forward, hips down, shoulders protracted. Lean forward and hold for 5 to 10 seconds. For a total beginner, three sets of this per session is enough. This is the position every other exercise in the routine builds from.
Stage 2: Parallette-Supported Planche Lean
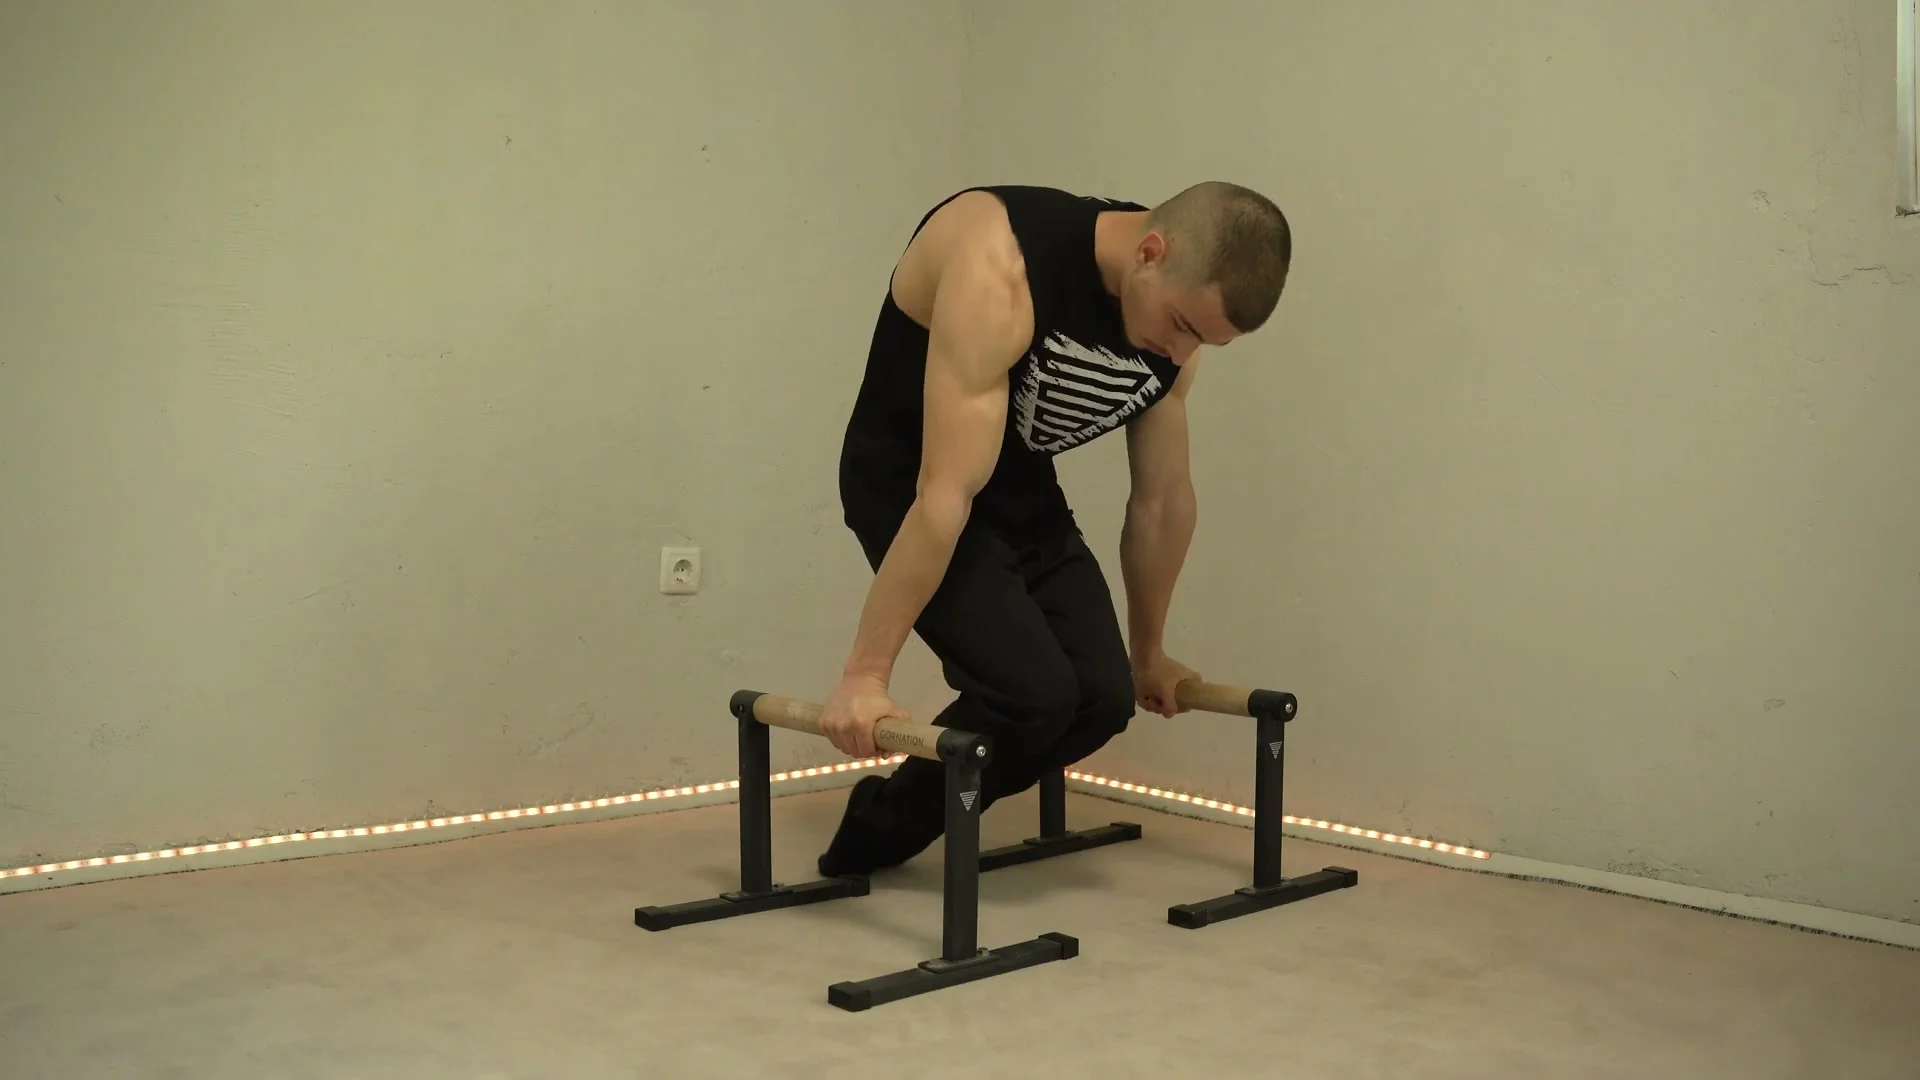
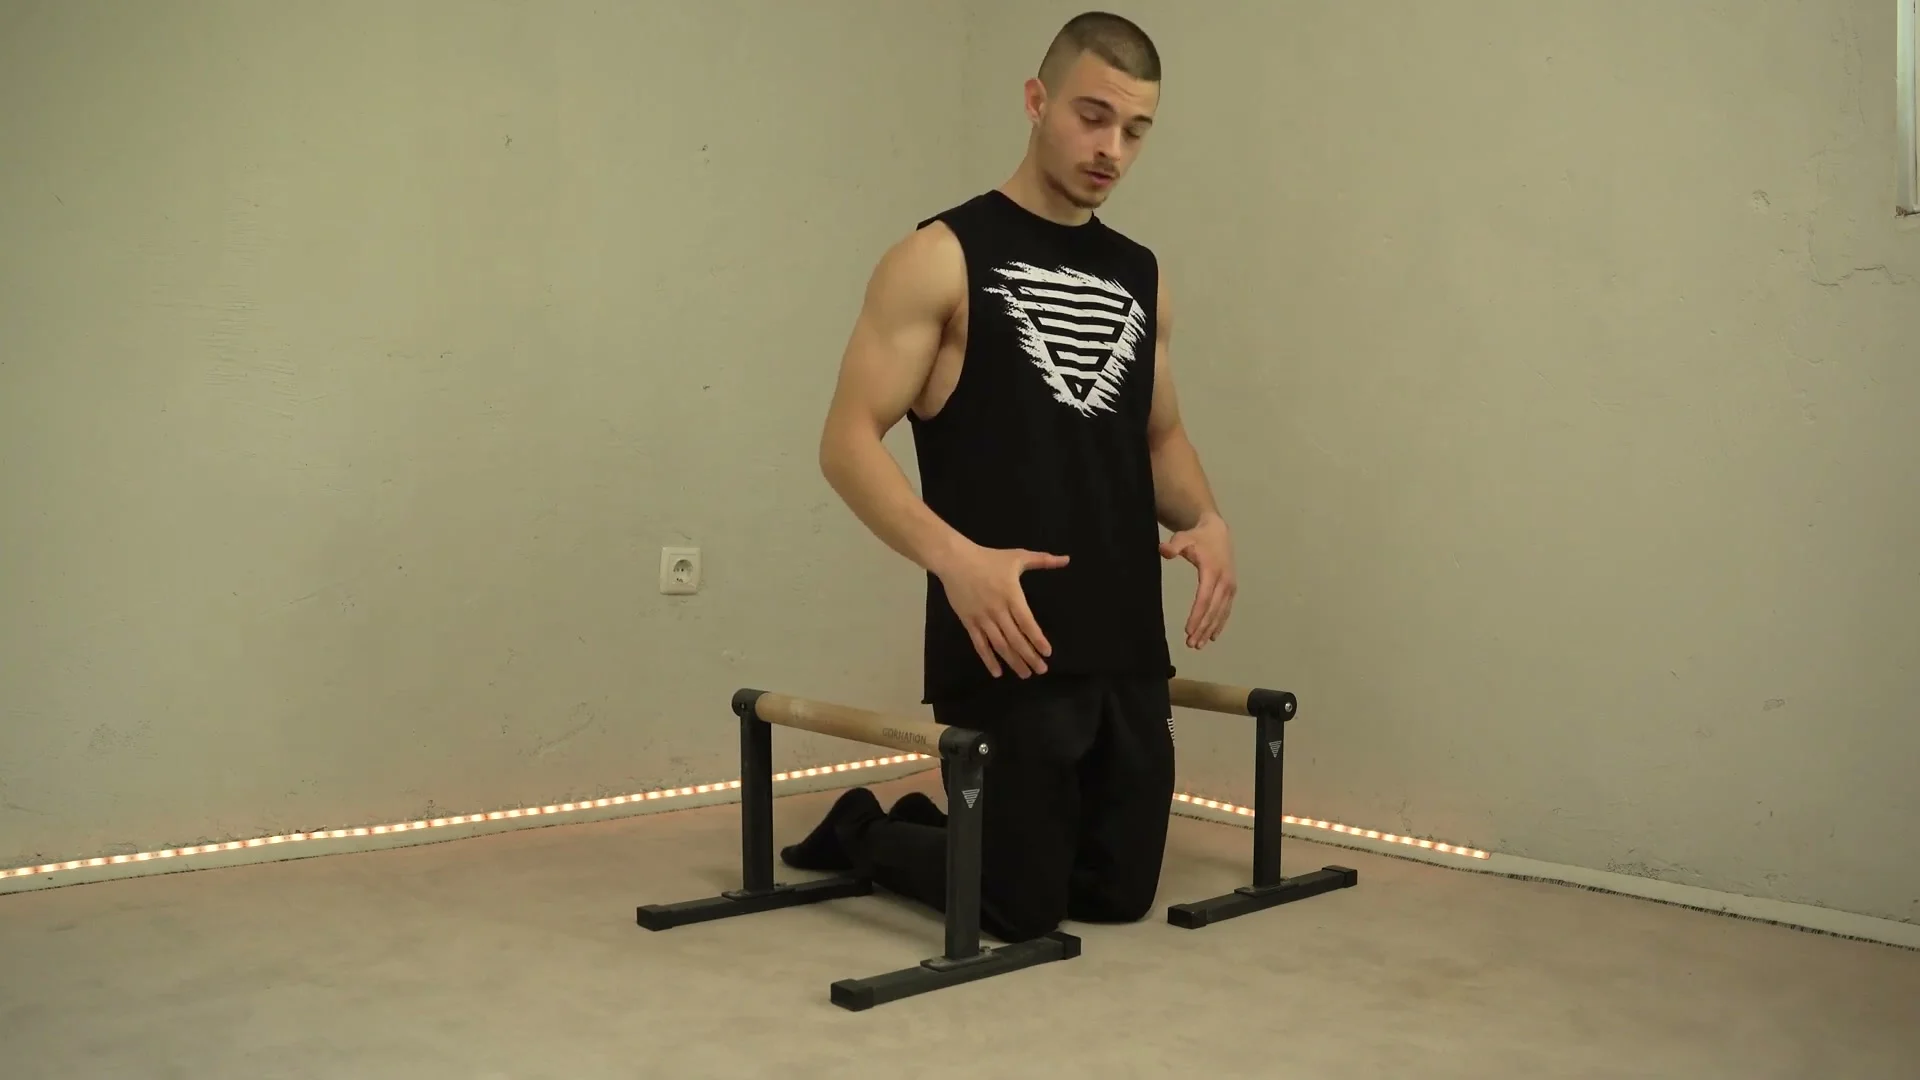
Same setup, but on parallettes with your legs still supporting some weight on the ground. Push into the parallettes, get the protraction, and lift a little. If you cannot hold it, do not force the hold, just move through the exercise: lean forward and back. Aim for three to six reps.
Stage 3: Lean Push-Ups
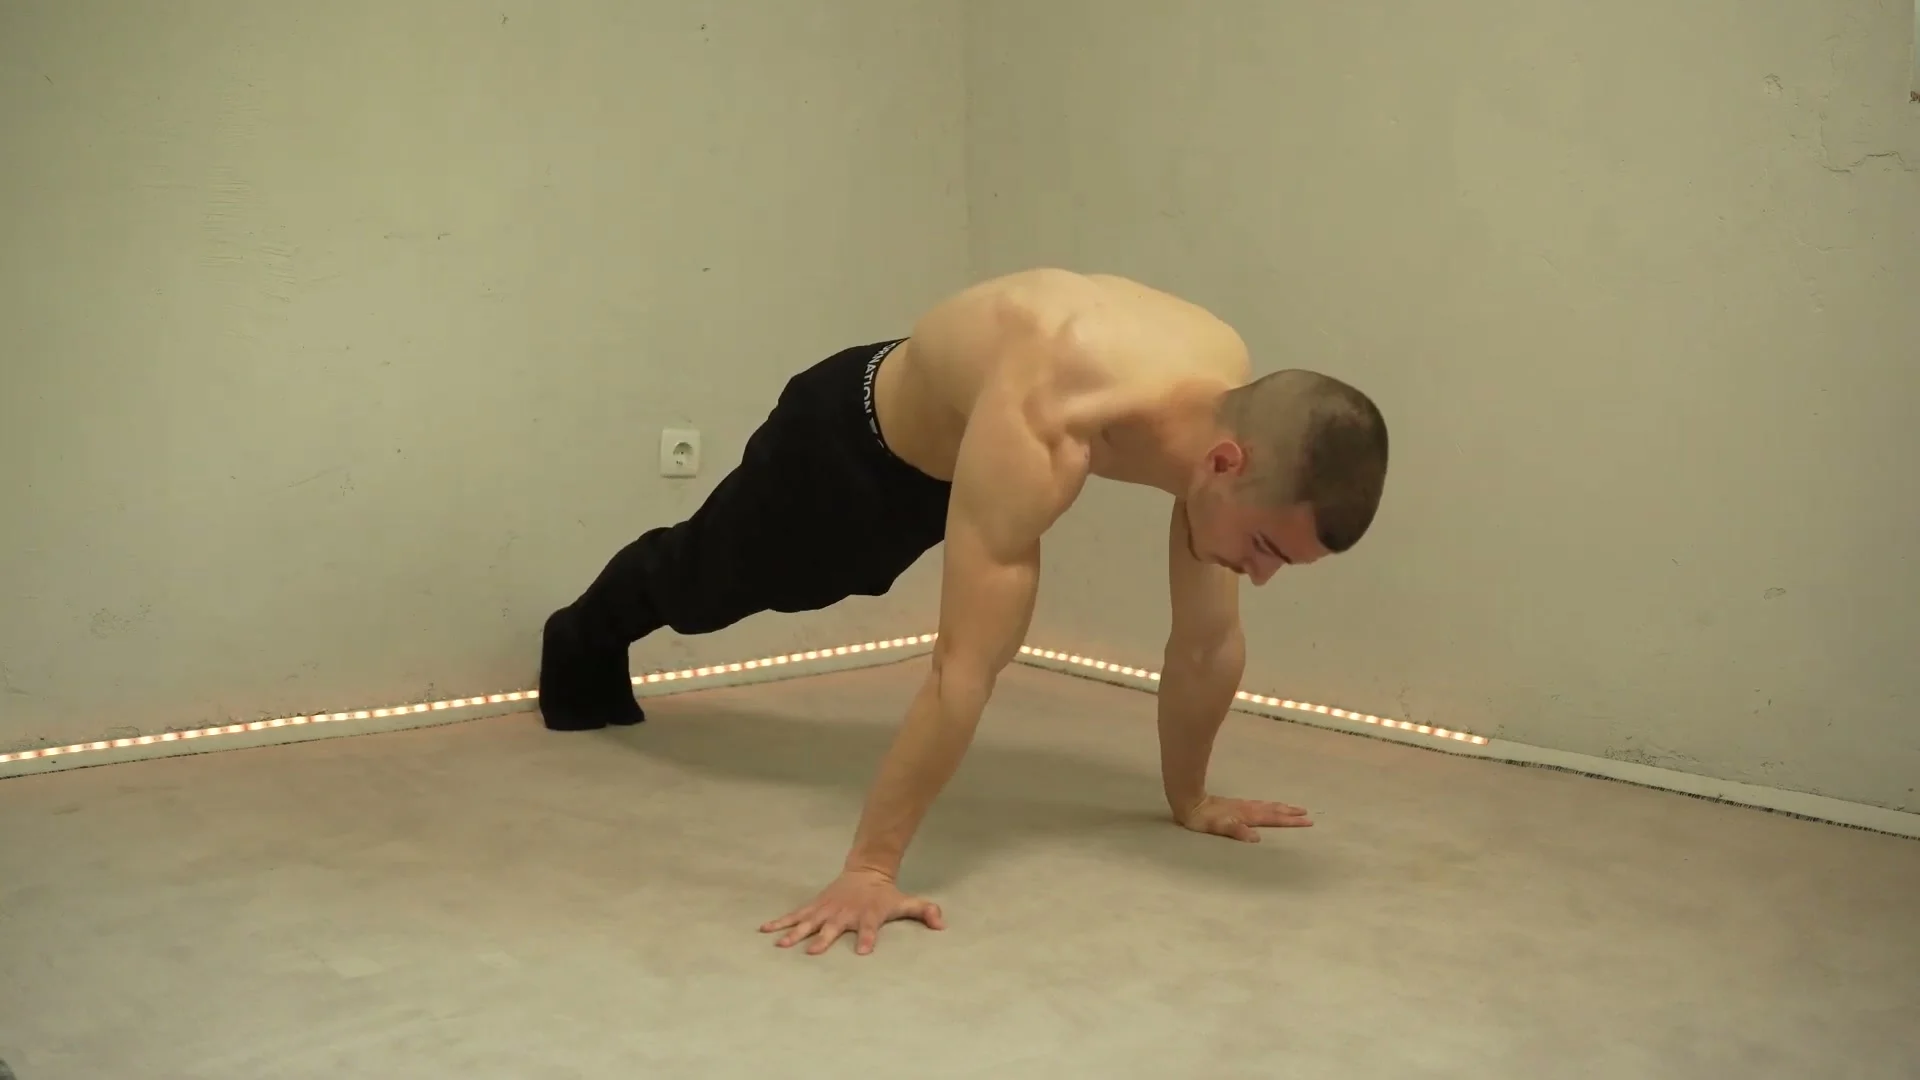
Combine the lean from Stage 1 with a push-up. Lean forward, then move through protraction and retraction with your shoulders and back while keeping that straight body line. This adds a dynamic element on top of the static lean.
Stage 4: Wall-Assisted Push-Ups
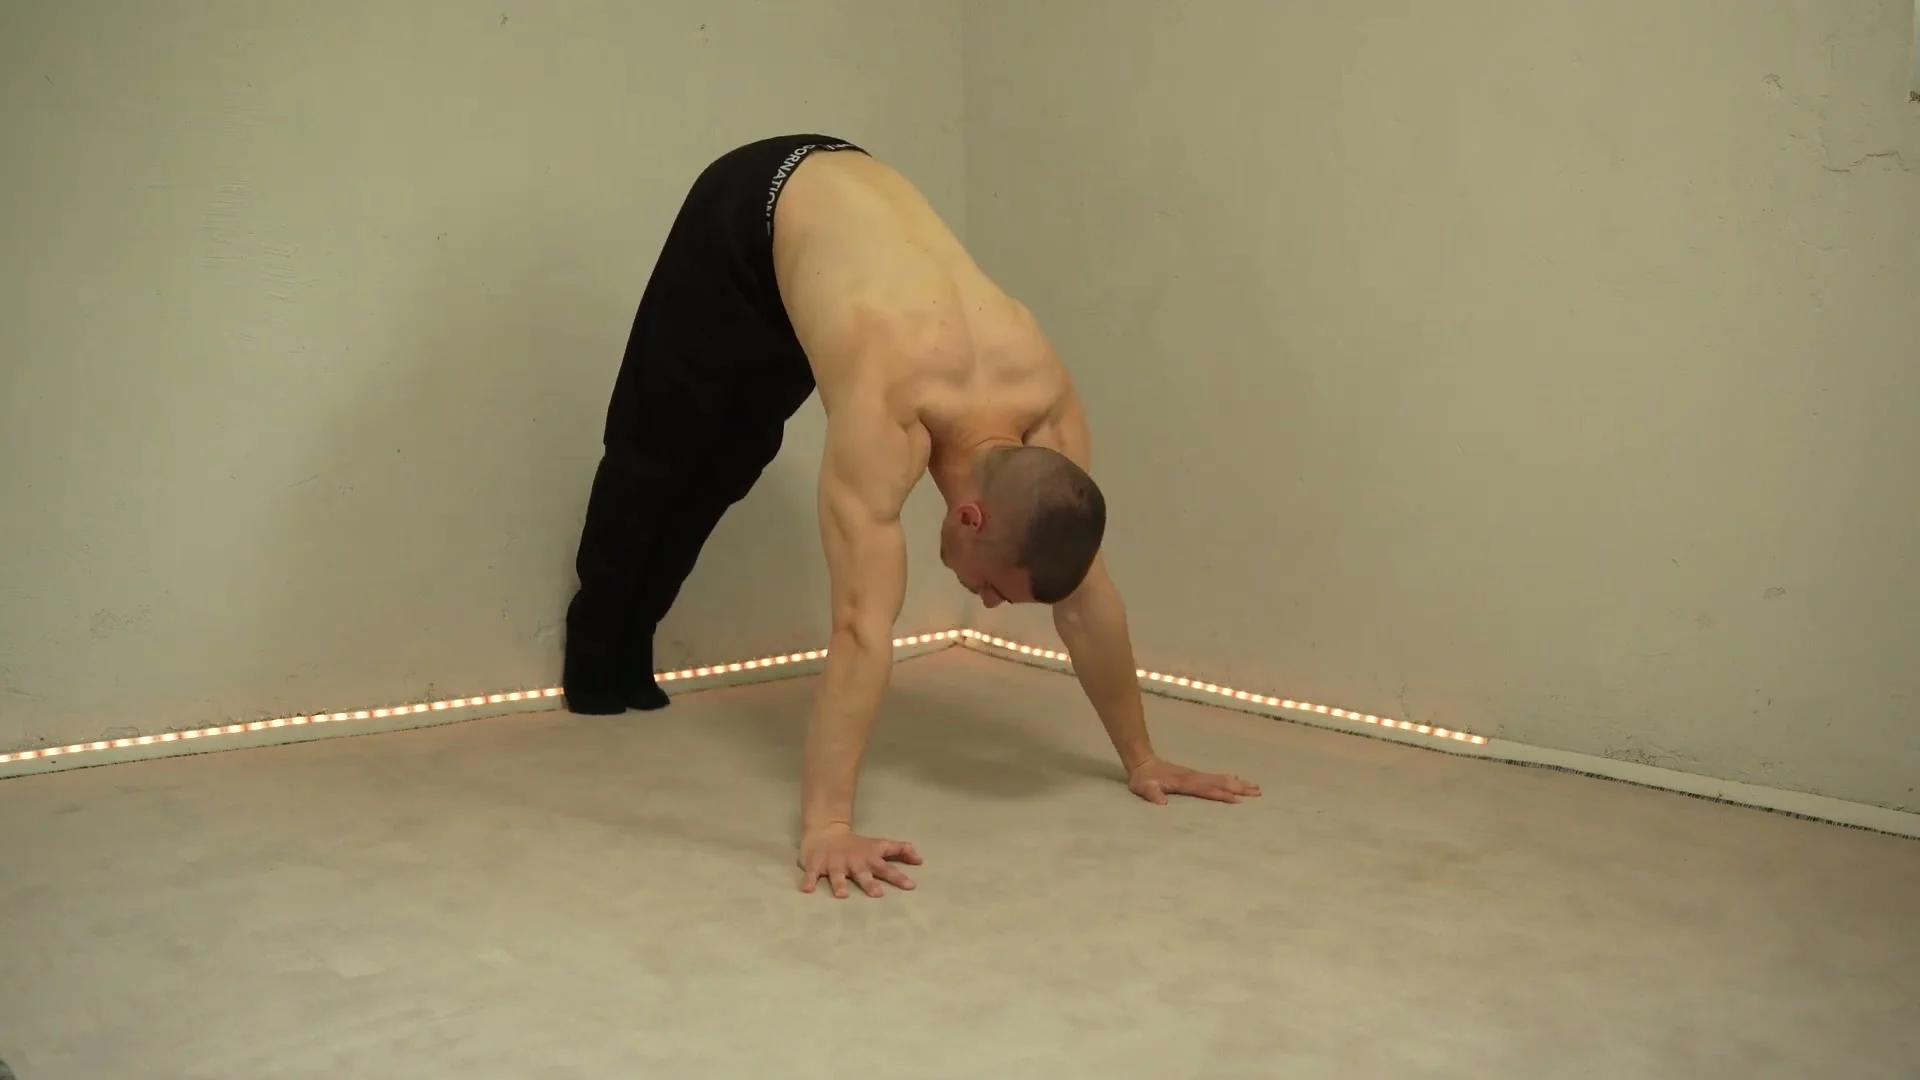
Use a wall for support and relax into the position. Push through the middle of your hands rather than leaning too far forward or staying too upright. Three sets of 5 to 15 reps, depending on your current strength level.
Stage 5: Normal Push-Ups (With a Lean Option)
Finish with standard push-ups, hands under your shoulders, not flared out to the sides since that turns it into a different exercise. Once normal push-ups feel manageable, add a small forward lean on the more advanced version, still keeping the same protraction position at the top.
Common Mistakes
Locking the Wrong Joint
A common error is locking the wrists instead of keeping the elbows straight and the biceps turned forward. The elbow lock is what protects your joints and lets you actually load the position.
Wrong Grip Width
Going too wide loads the thumb, going too narrow loads the wrist. Both can lead to injury if you repeat them under load. Keep your grip in the middle until you know your own wrist tolerance.
Losing the Body Line
Sagging hips or a rounded back turns a planche lean into a plank with your shoulders doing extra unwanted work. Keep the line from shoulders to heels straight through the whole hold, not just at the start.
Forcing the Hold Before You Are Ready
On the parallette lean especially, do not grit your teeth and force a static hold you cannot control. Move through the lean forward and back instead. The hold time comes later, once the strength is actually there.
If you want a coach checking these positions on video before you build bad habits into your training, that is exactly what I do inside online coaching.
Training Tips
Train all five exercises in the same session, in order, rather than picking one or two and skipping the rest. Each one prepares the position and strength for the next.
Do not chase hold time early. Three sets of 5 to 10 seconds on the ground lean is genuinely enough for a beginner. Extending the hold before your position is clean just reinforces bad habits under fatigue.
Warm up your wrists, elbows, and shoulders before every session. This routine puts real load through straight arms, and a cold joint is far more likely to feel wrong under that load.
Keep training two or three times a week, or more if you want. Consistency across weeks is what moves you through these five stages, not intensity in any single session.
Frequently Asked Questions About the Planche
How often should I train planche exercises as a beginner?
I recommend two or three times a week, or more if you want. Just make sure you warm up your body before every session.
Do I need parallettes to start training the planche?
No. The first exercise in this routine, the ground lean, needs nothing but floor space. Parallettes are useful for the supported lean exercise but are not required to begin.
How long should I hold a beginner planche lean?
For the ground lean, hold each rep for 5 to 10 seconds. That is enough for a total beginner. Do not chase longer holds before your position is clean.
What if I cannot hold the parallette lean at all?
Do not force it. Move through the lean forward and back without trying to hold a static position. The hold time will come as you build strength through the other exercises in the routine.
Why do my wrists hurt during these exercises?
Check your grip width first. An outside grip that is too wide stresses the thumb, and an inside grip that is too narrow stresses the wrist. A middle grip position usually solves this.
How many reps should I do for the push-up variations?
For wall-assisted push-ups, aim for 5 to 15 reps depending on your strength. For normal push-ups, 5 reps is a solid starting point before adding the forward lean variation.

Daniel Hristov is a four-time calisthenics world champion and coach. He shares the exact methods he uses to train his own athletes.
More about Daniel →